 Full list of equipped paths
  Via ferrata
 Equipped path
 Equipped section
 Equipped canyon
 Via cordata
 Via cable
 Trails
 Bike routes
 Blog
Blog All photos
 Mountain guides
Ok
25-08-2019 deandar.com
No status information for the last 9 months. Add status alert
Via ferrata La Mocha | Iruela
One of the best vias ferrata for beginners that we’ve done so far. It has a varied route, with demanding sections and a very exposed one close to the Mocha summit.
K3Community of AndalusiaVia ferrataFor beginners10 €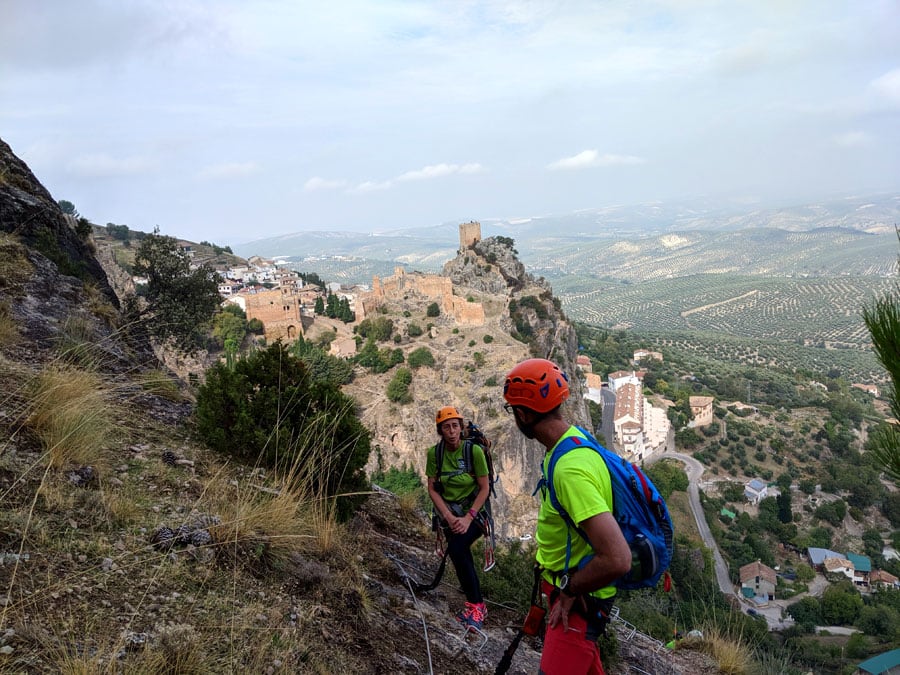
Good views of the castle of La Iruela


Location
La IruelaSierra de CazorlaJaénCommunity of AndalusiaSpain Technical description Route status
  Type
Type  Access Time
 3'
 Route duration
 2 h. 20'
 Return duration
 1 h. 15'
 Length of Equipped Section
 720 m.
 Total Distance
 5 km
 Equipped Ascent
 120 m.
 Total Level Difference
 250 m.
 Desplomes
 1
 Bridges
 1
 Zip line
 0
 Rope
Rope No
 Beginners
 Yes
 Child Friendly
  Private
 10 €
 Orientation
 West
 Season
- Tierraventura Cazorla & La Iruela
- Year: 2016
- 953 710 073
- @contact
How to get there
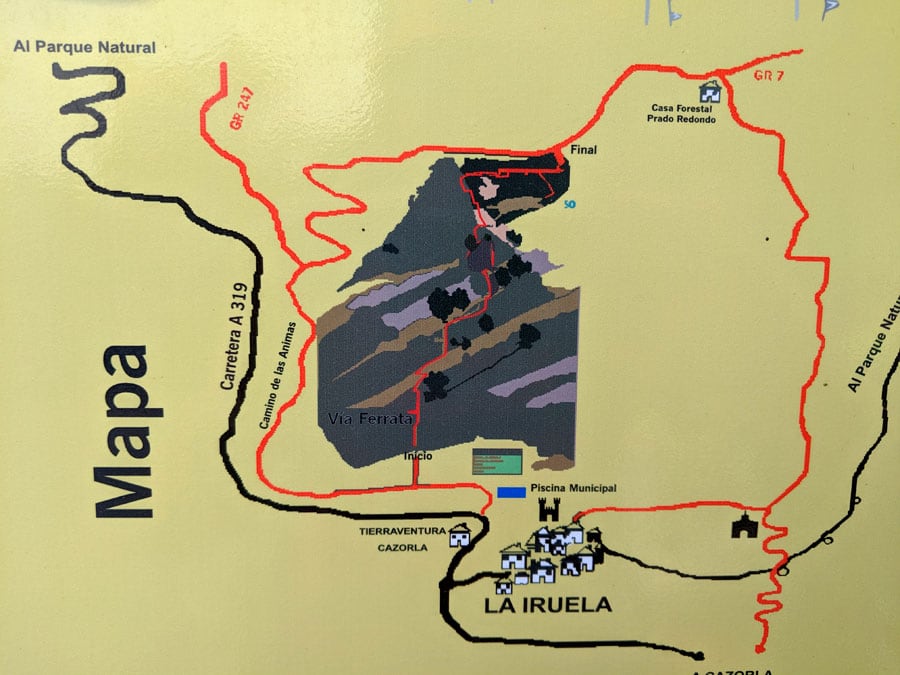
We’ll reach La Iruela coming from Cazorla along the A-319, and we’ll drive along it almost to the end. We’ll park before getting to the Municipal swimming pool, at the 16.5km mark, leaving the offices of Tierraventura Cazorla behind. There’s space for ten cars to the left, and for three to the right.
Getting closer
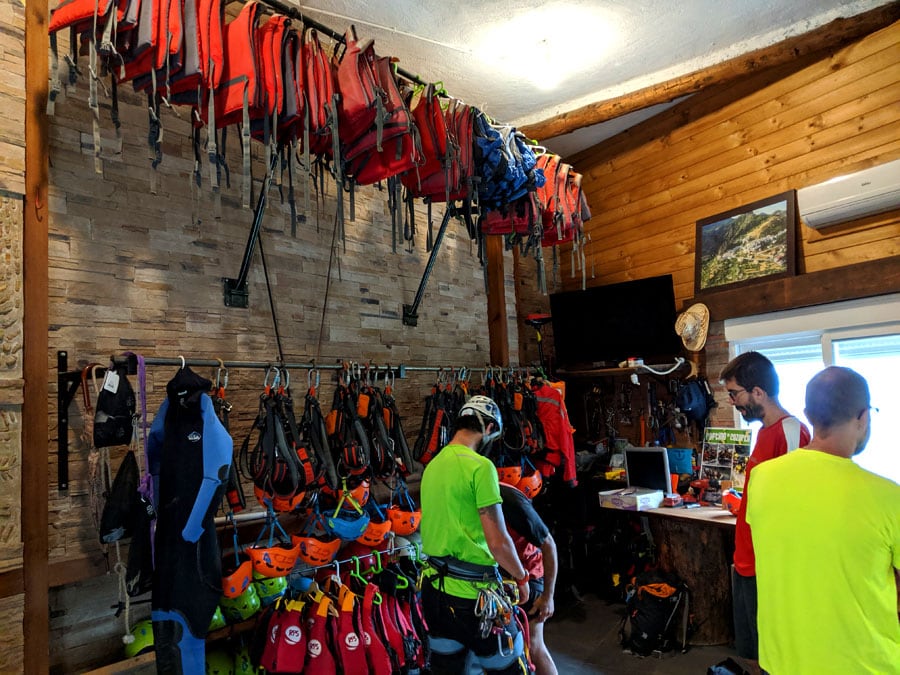
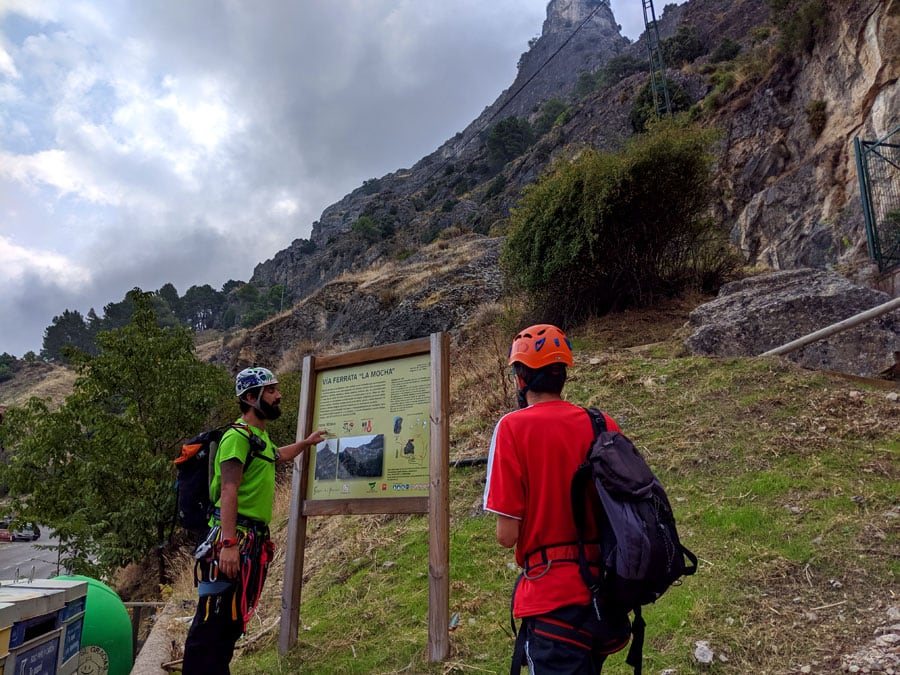
We’ll see La Mocha from the parking space, and the via ferrata creeping up it. If we follow the right hard shoulder we’ll get to some stairs and an informative signpost about the ferrata. This one is private; we’ll have to pay the entry fee in the Tierraventura Cazorla offices (75 metres back along the road).
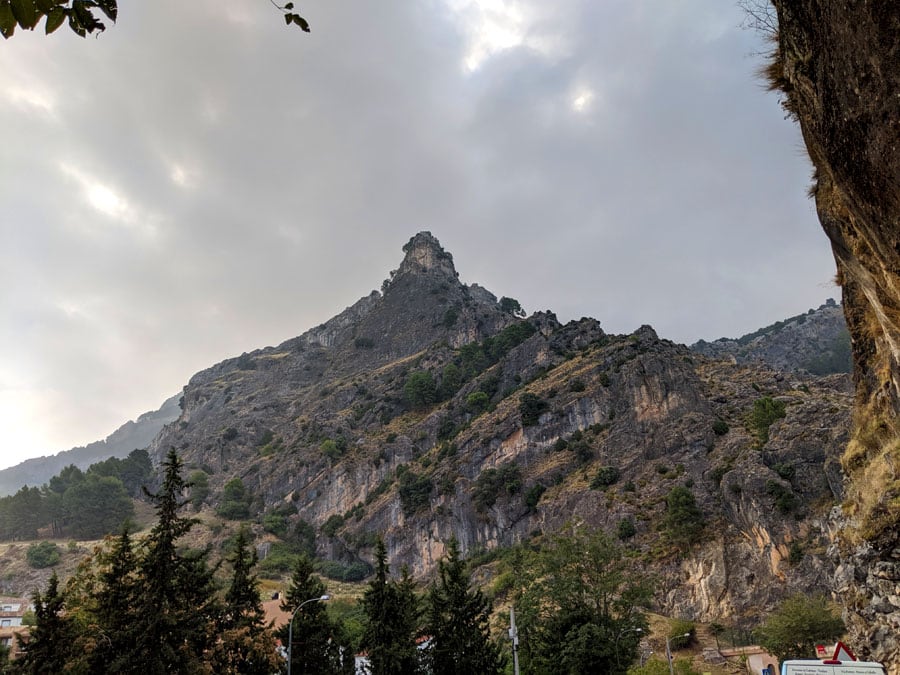
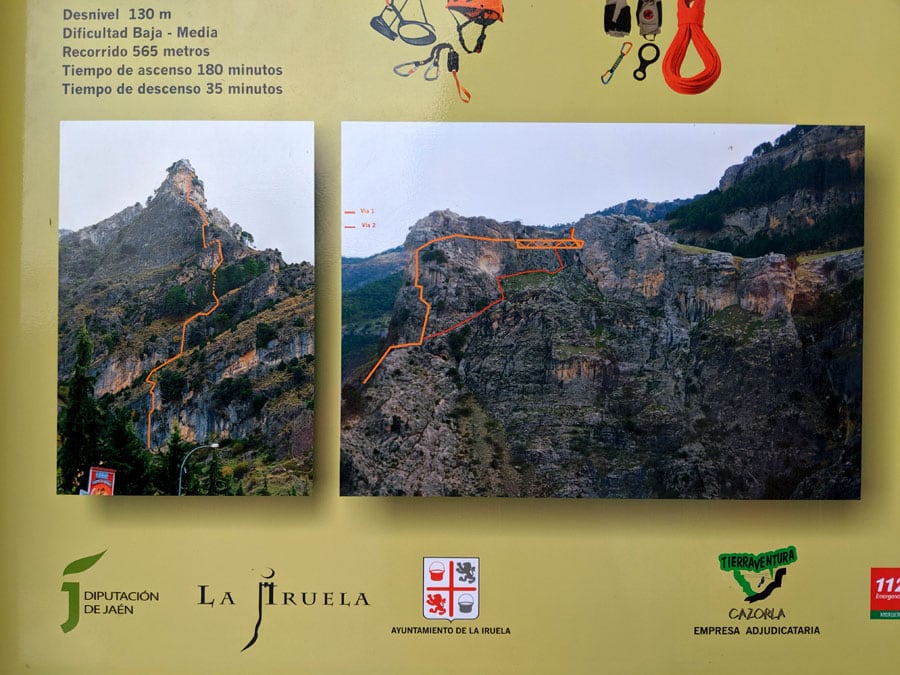
The route
View of the top of La Mocha from the A-319 road in La Iruela
We always recommend two options to those who want to begin their initiation into the world of ferratas, and both have the same objective: to be able to do them with the maximum of safety. The first one would be to hire a professional guide. If that one is not an option, our advice would be to go for a private ferrata, because you’ll be sure the gear installed is to be trusted and will avoid potential surprises.
Here in la Mocha, in La Iruela, both options apply. If we have some experience already, we can just pay the 10€ fee. If we need training, we can hire a certified guide plus the gear in an all-inclusive package.All this you can find in Tierraventura Cazorla, the tourism company that manages the area and also created and equipped the whole project.
Another plus side to all this is the fact that la Mocha via ferrata is a great beginners’ route; long, varied and not lacking in challenges, set in a unique landscape at the entrance of the Parque Natural Sierras de Cazorla, Segura y las Villas, Spain’s largest protected area and the second largest in Europe.
We couldn’t wish for more. As mentioned in other specialised blogs, it’s one of those via ferratas worth paying for, and we couldn’t agree more.
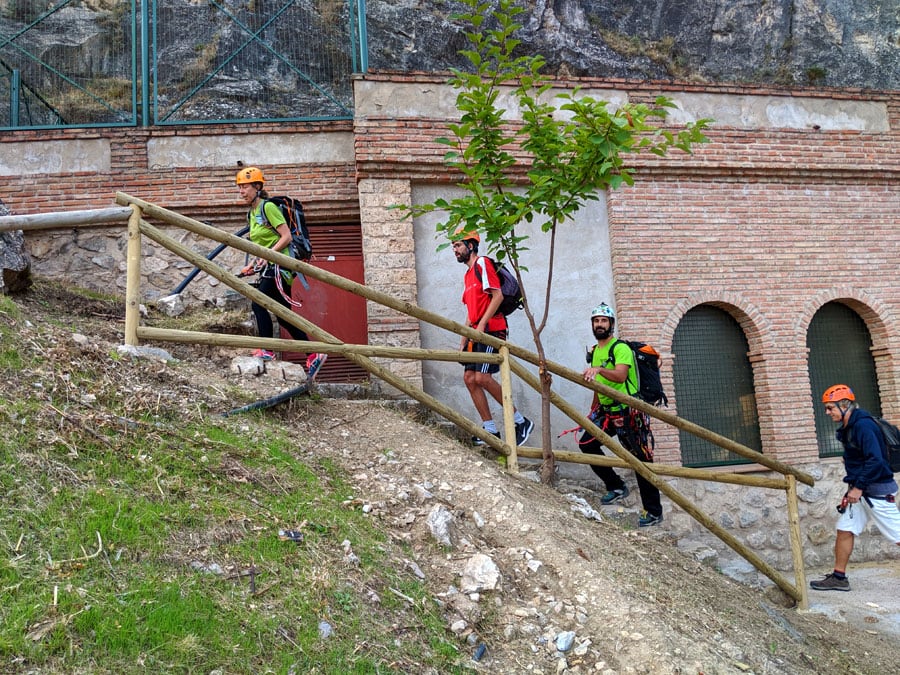
Entrance of the via ferrata
If we decide to do the route with a guide, there is a training area before we start the actual track: a 10 metre wall equipped with steps and a lifeline so you can descend via rappel. It’s our chance to gauge our strength before we start the hike. There’s even a small overhang to test our arms and see if they are up to the adventure.
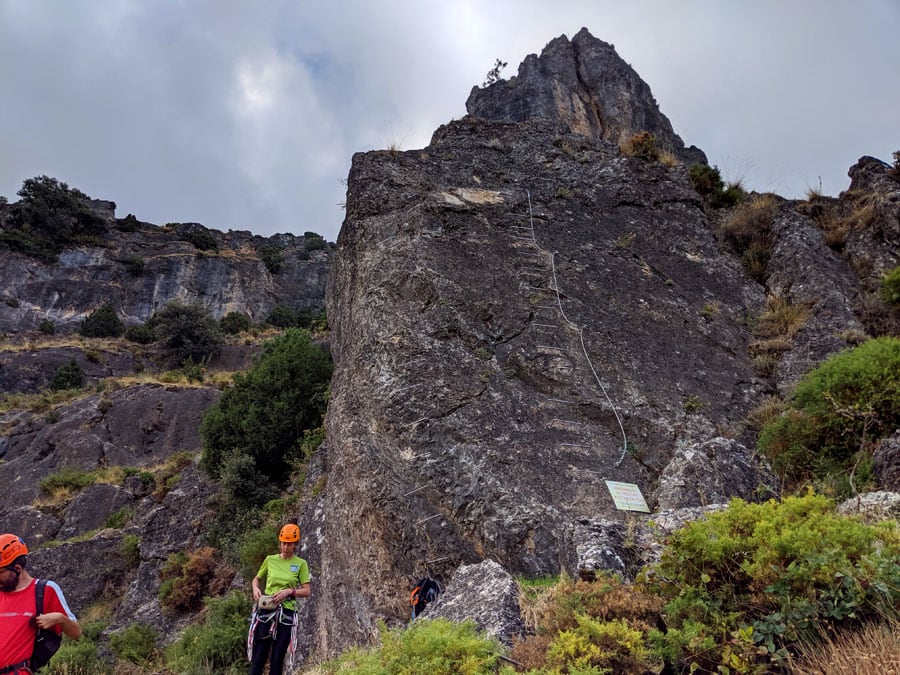
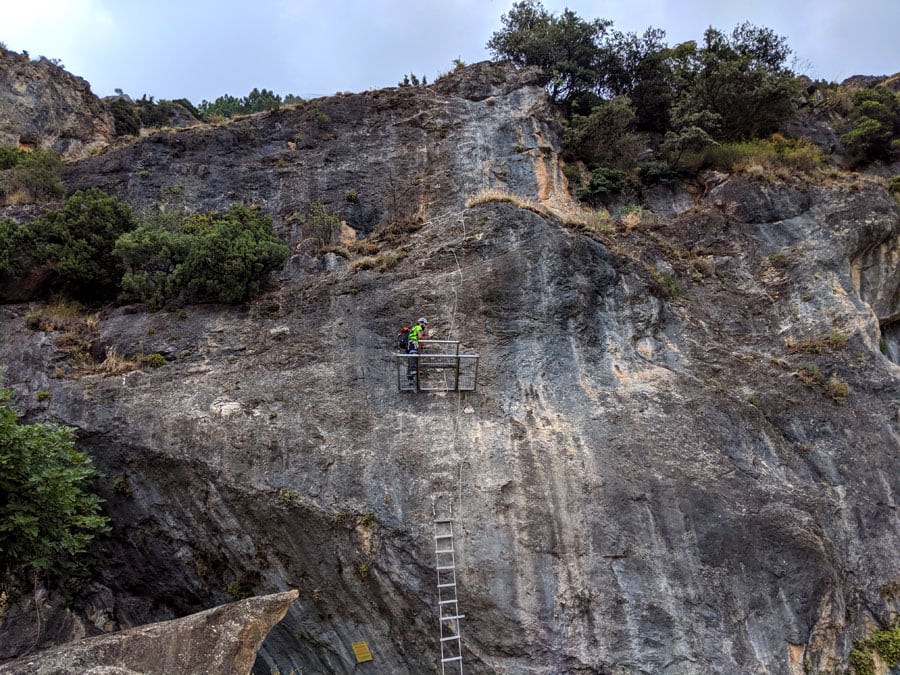
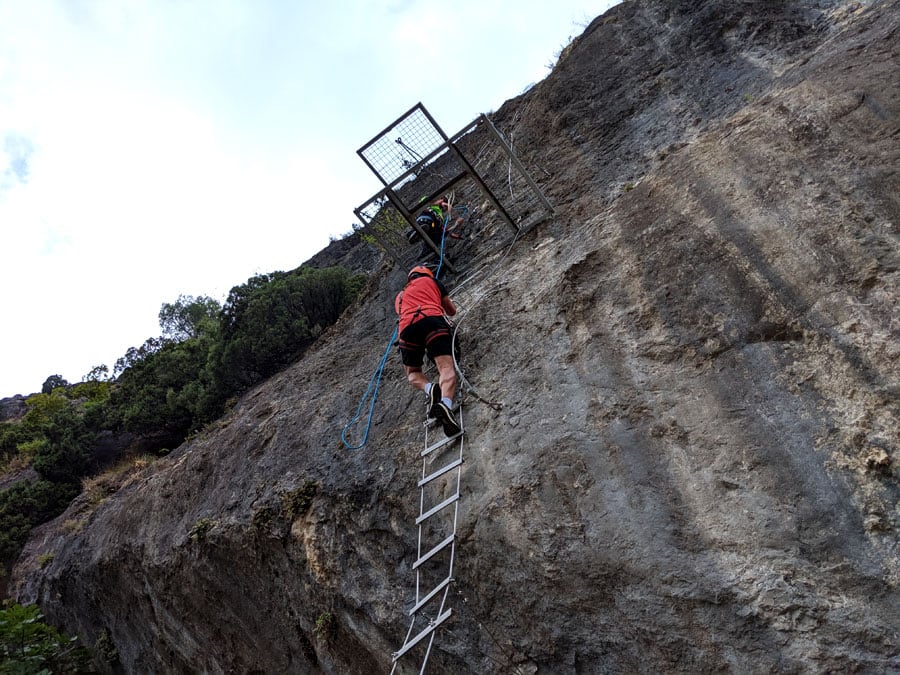
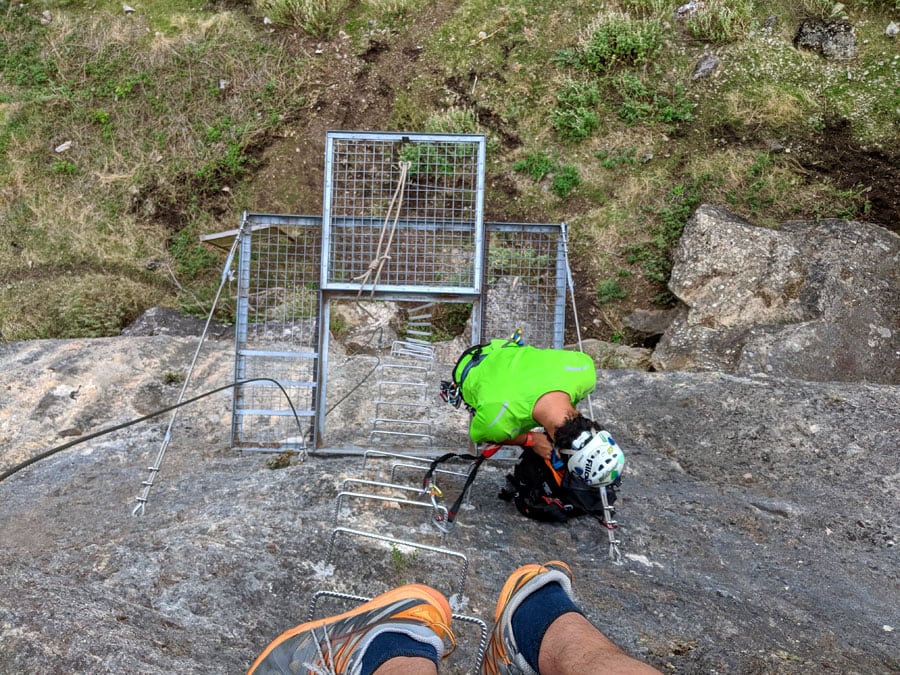
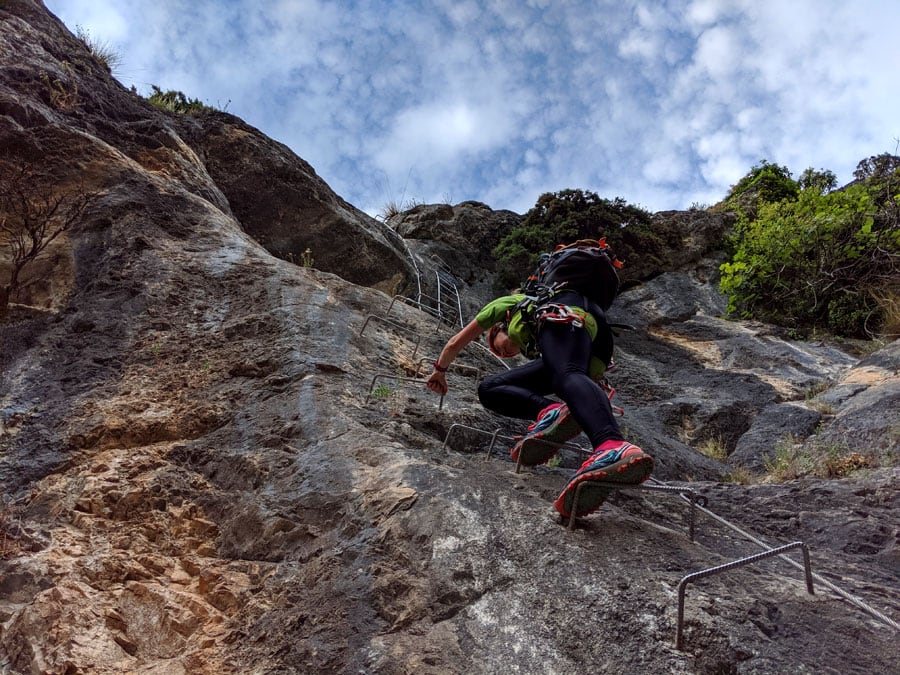
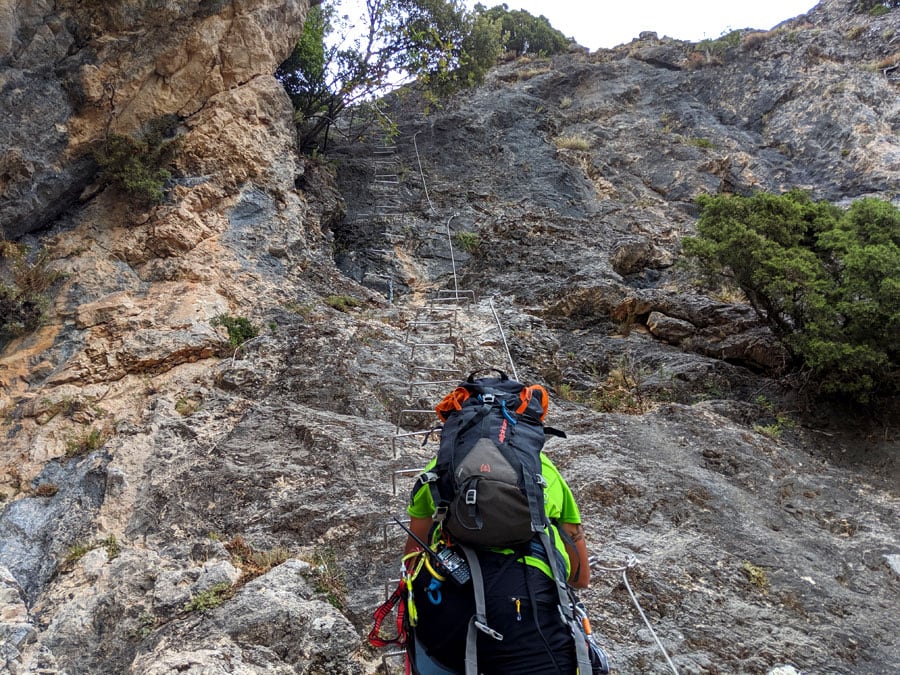
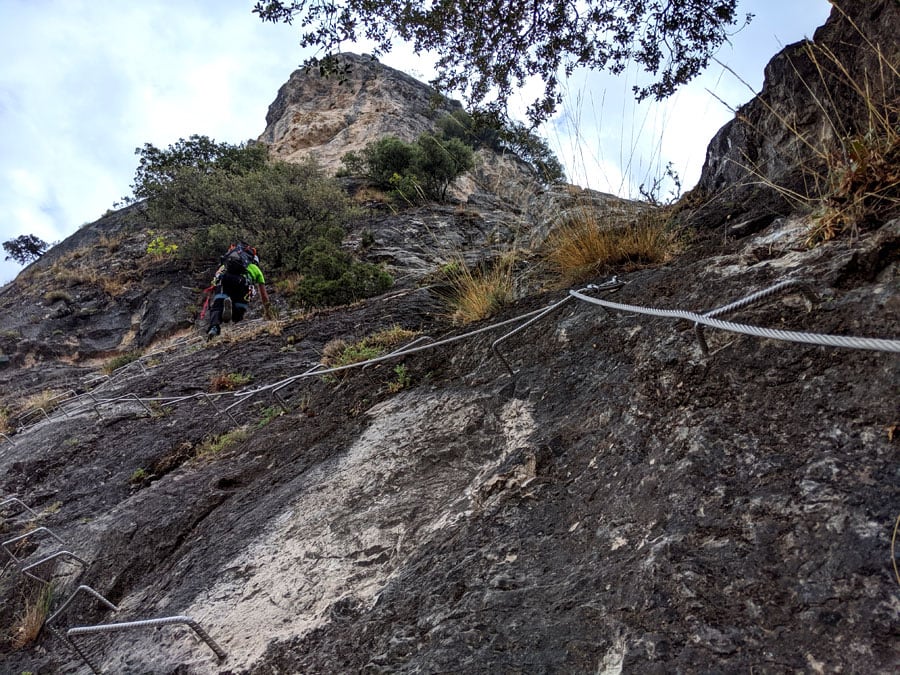
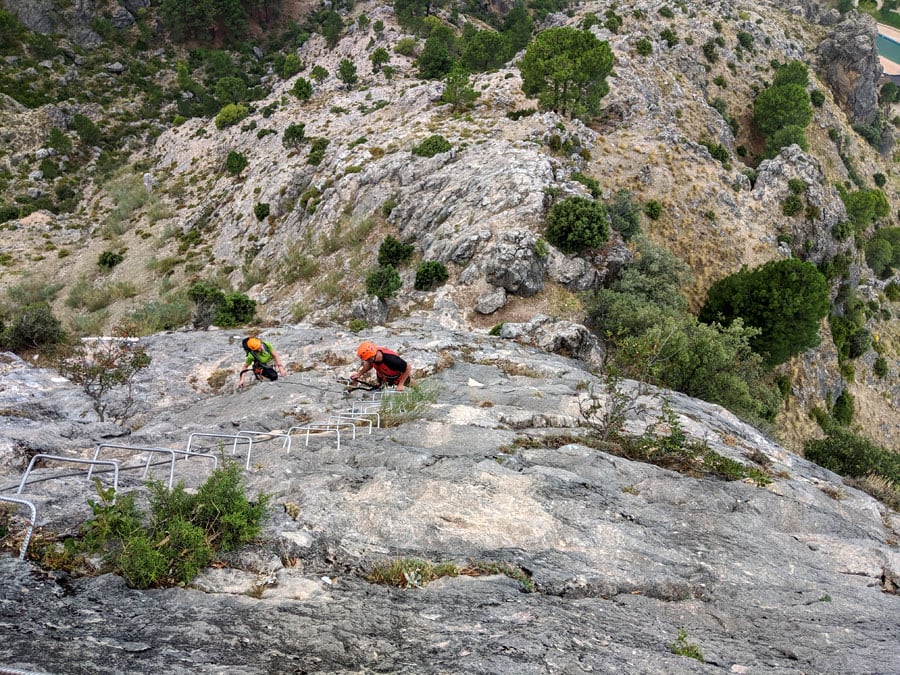
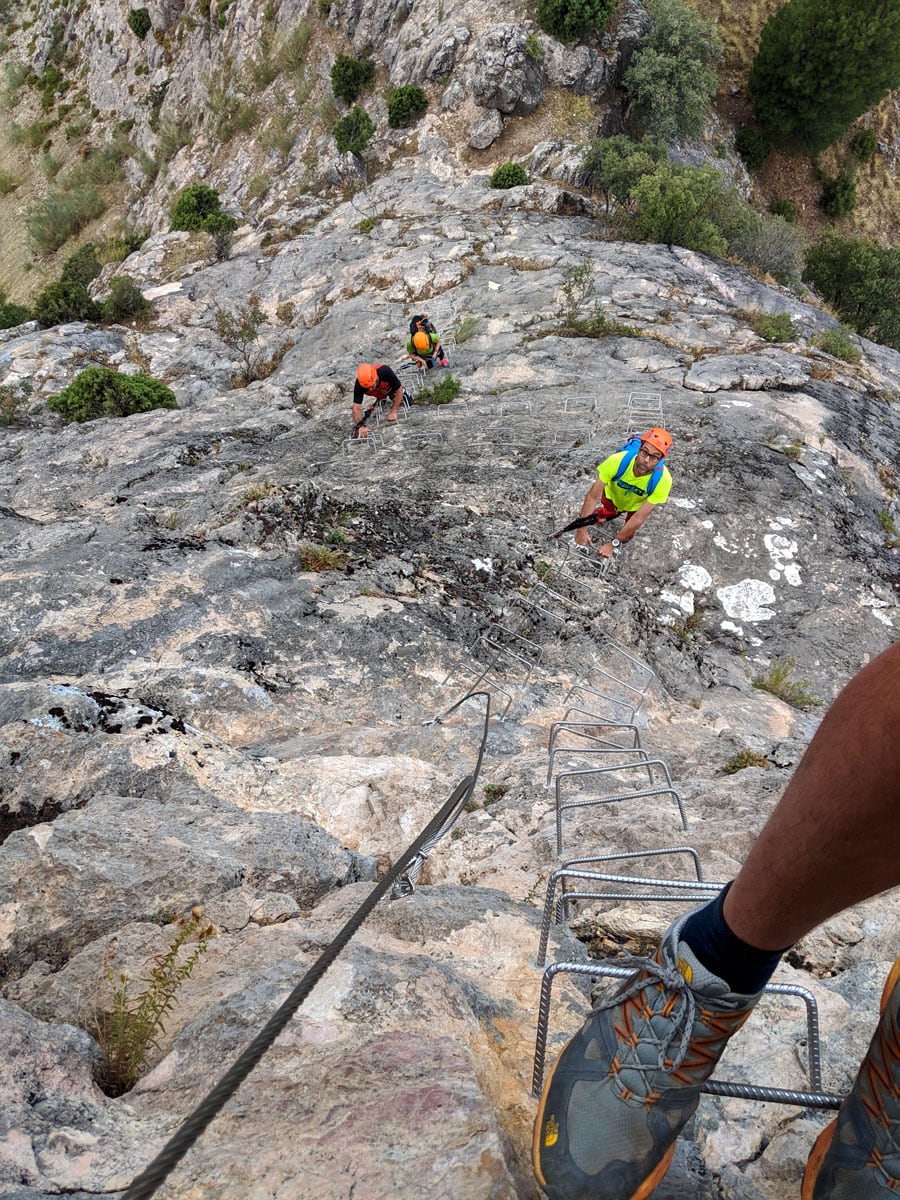
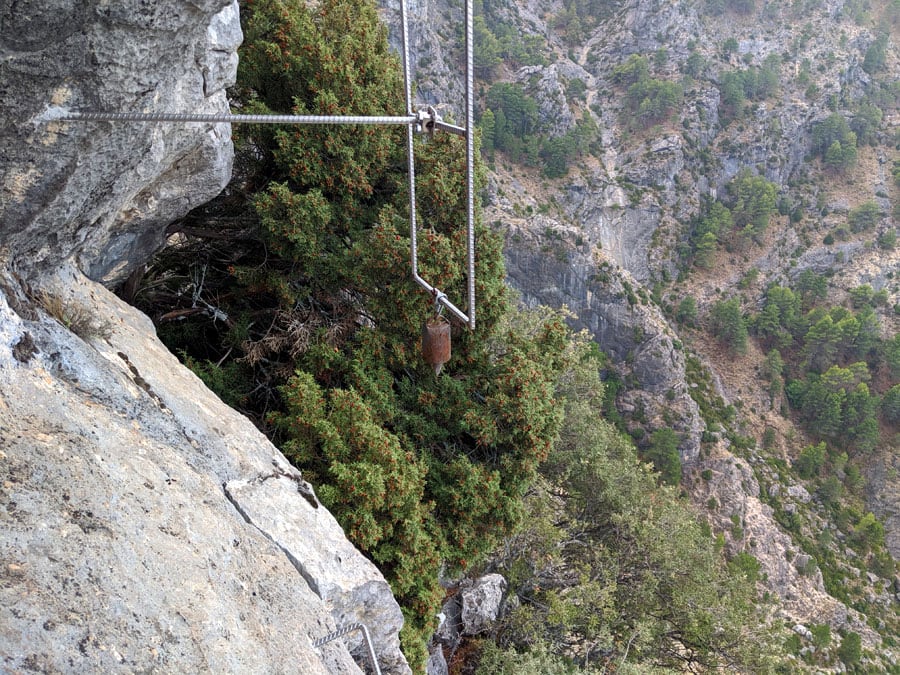
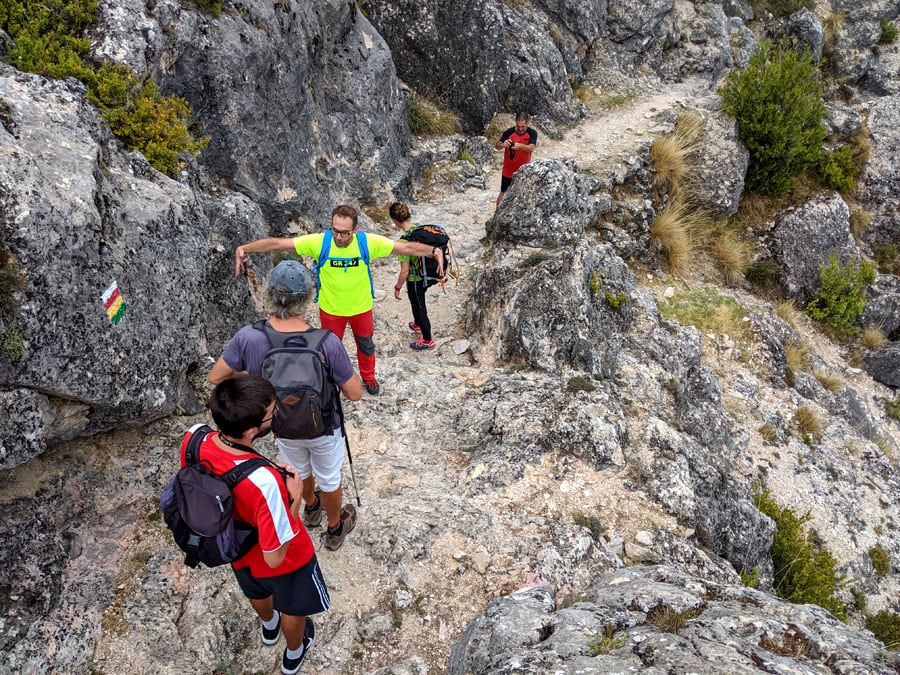
Once we’re ready, we’ll head over the entrance door of the ferrata: an electron style cable ladder with a top hatch to stop any incorrect access. Pay attention to the opening hours, as in the summer the ferrata is only open in the mornings. From now on we can expect a gradual increase in difficulty. It consists of a total of 6 vertical sections joined by more or less horizontal short ledges, with exits just in case someone needs them, and a final flanking section up to the 40m Tibetan bridge.
The first 30m section, and the second one, 15m, are a warm up; although vertical, they have plenty of equipment that makes the ascent easier. In this first contact with the installation we can already see that the makers didn’t cut corners on quality: everything is made of stainless steel. It’s obvious that this is not the first job this team has done: they got experience installing the nearby one, Malena Blues.
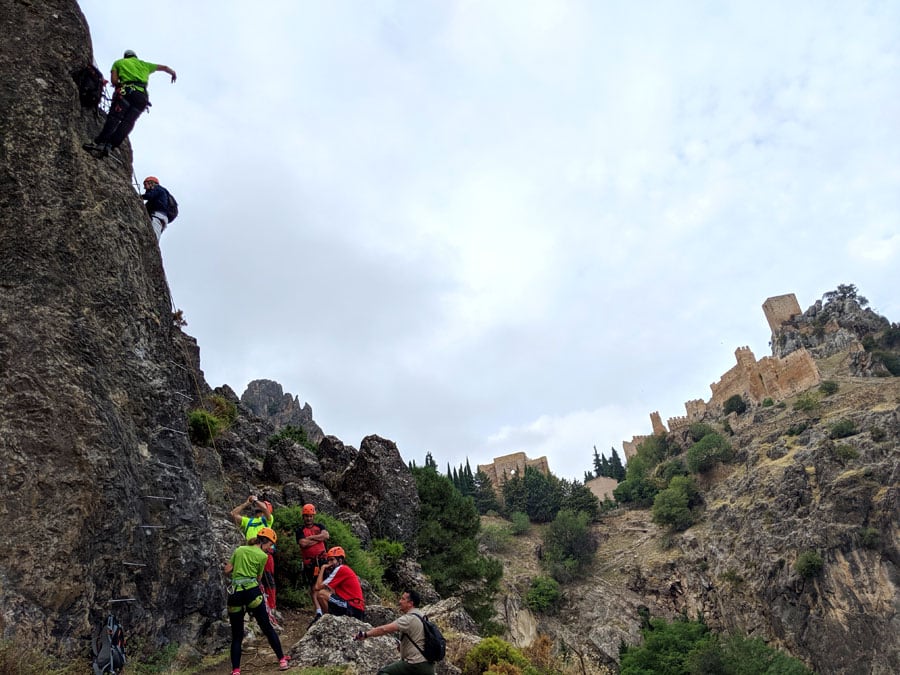
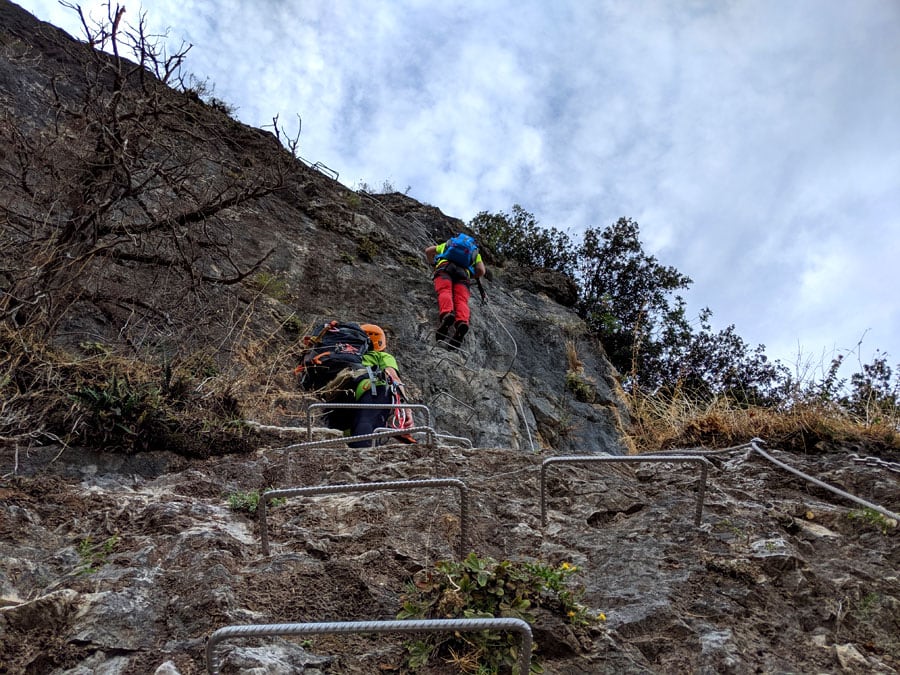
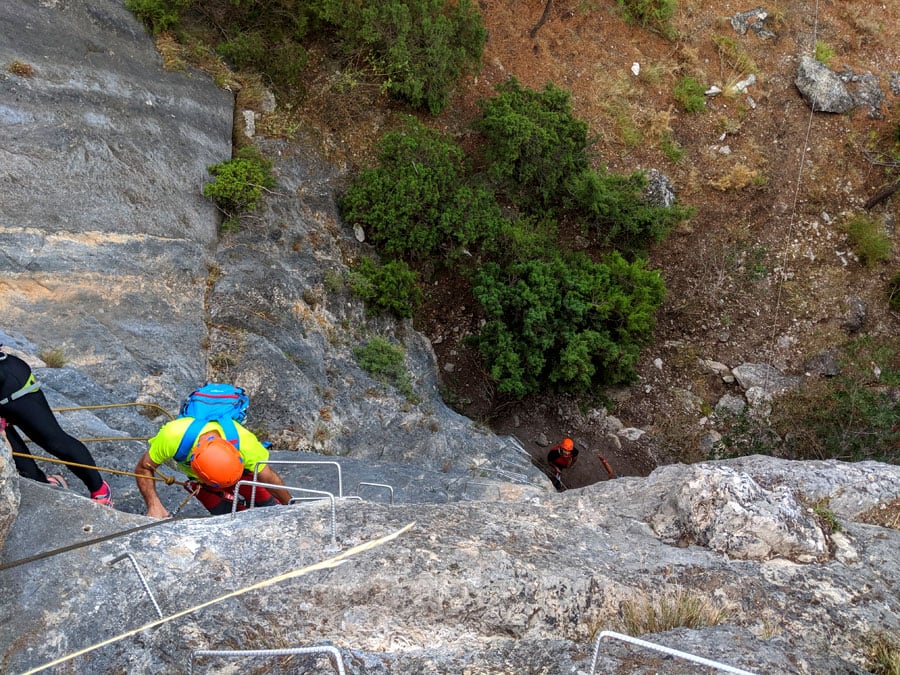
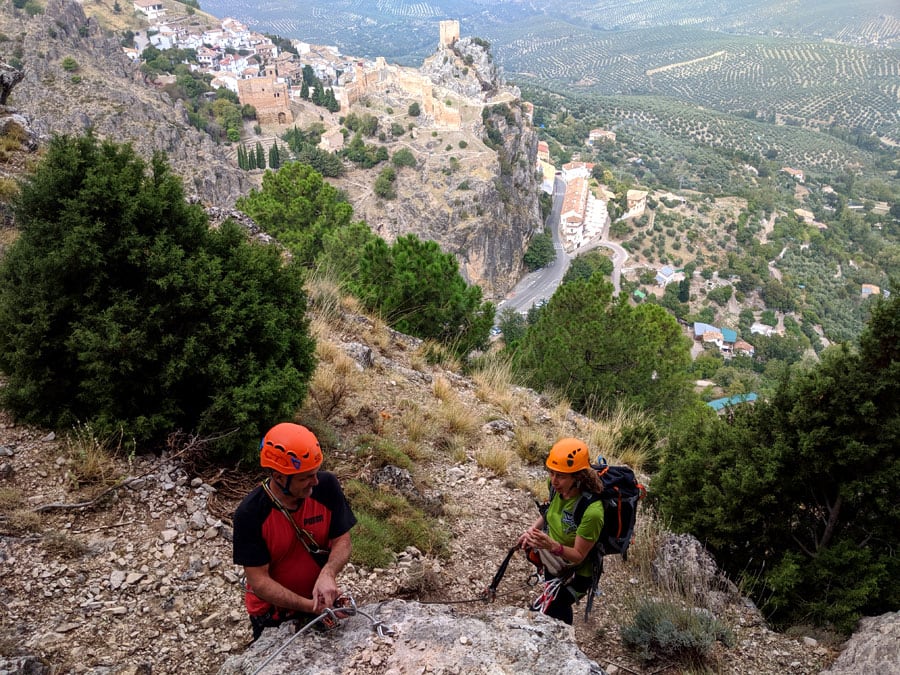
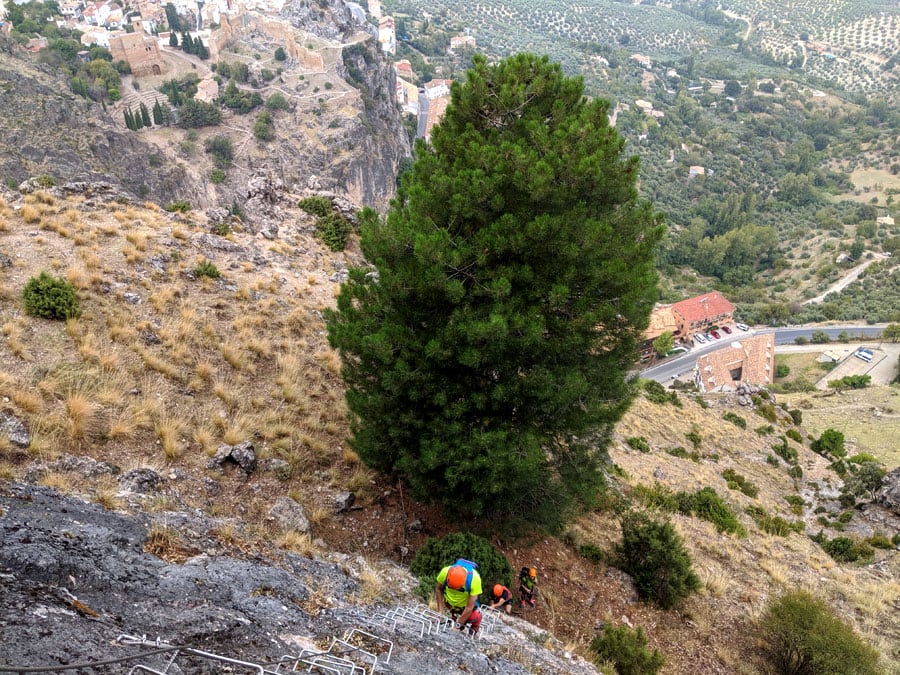
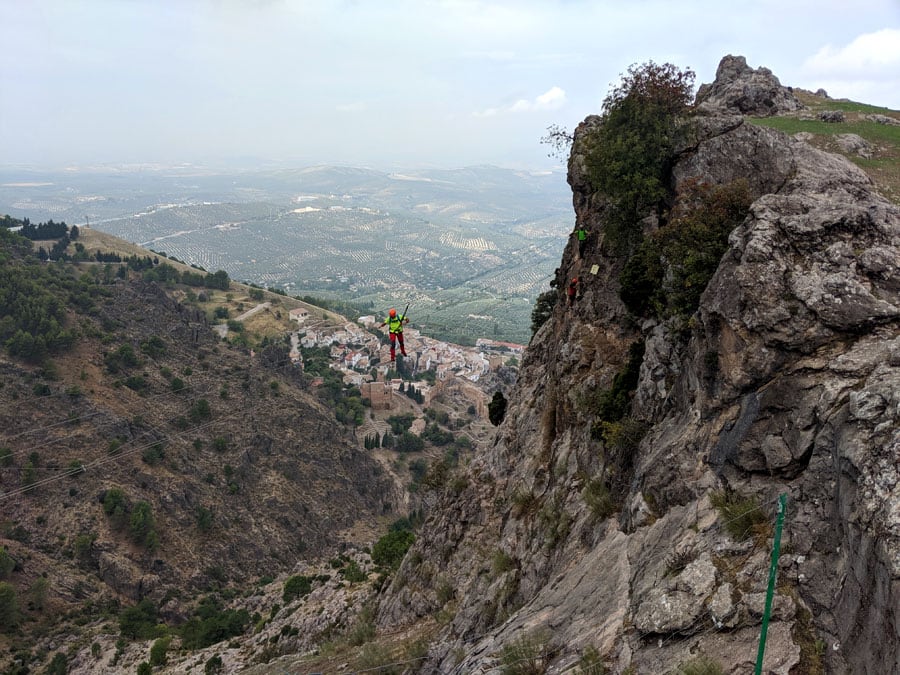
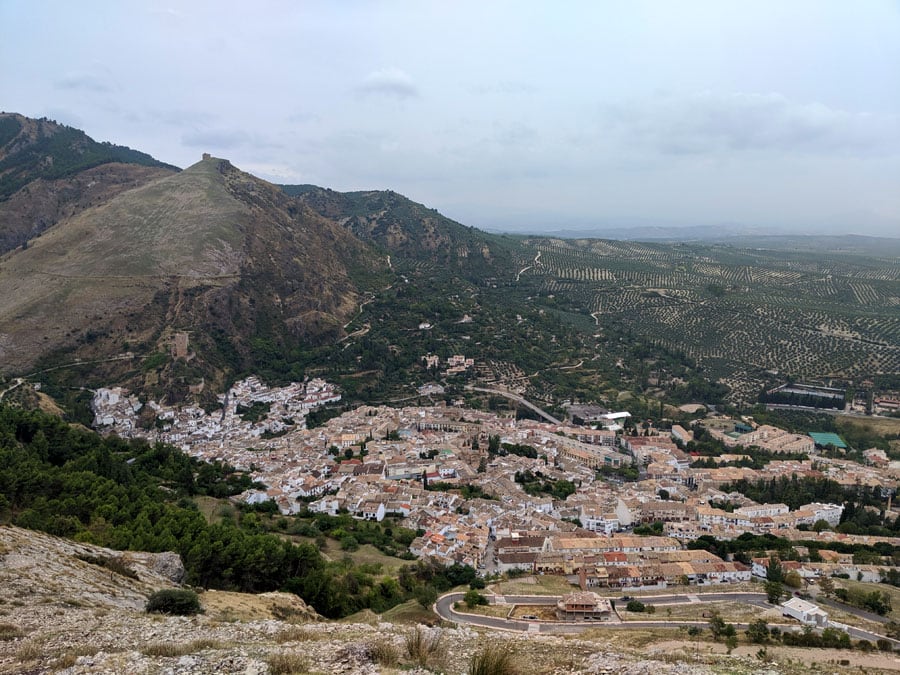
We’ll come up to the first difficult part in the 15m-long third section, protected by trees: a short and explosive overhang close to K4. The section has a metallic ladder on the right to save beginners any frights. From here, the views of La Iruela castle are spectacular, and if we climb further, they get better.
Third section
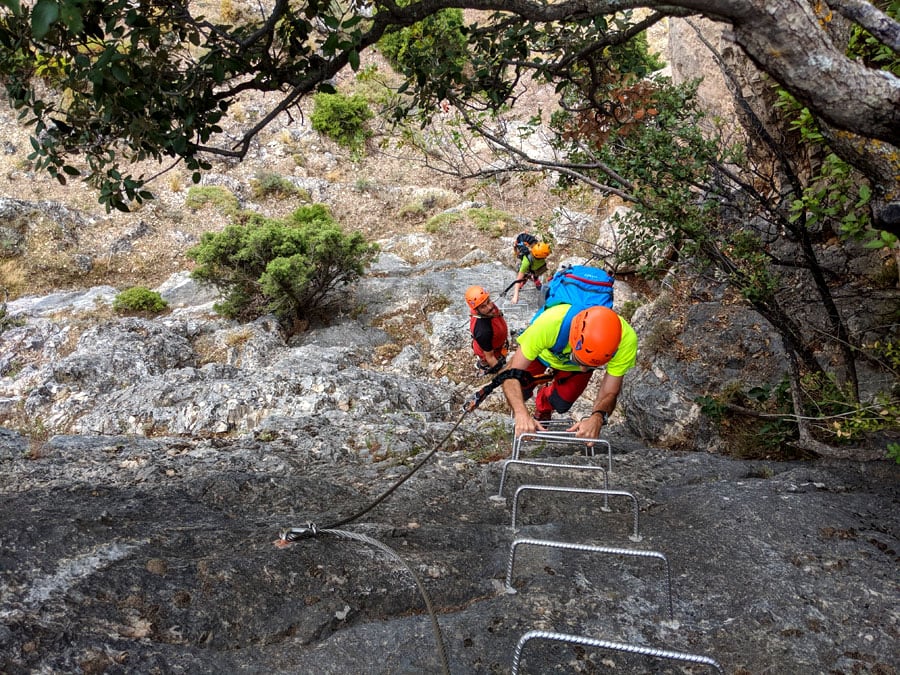
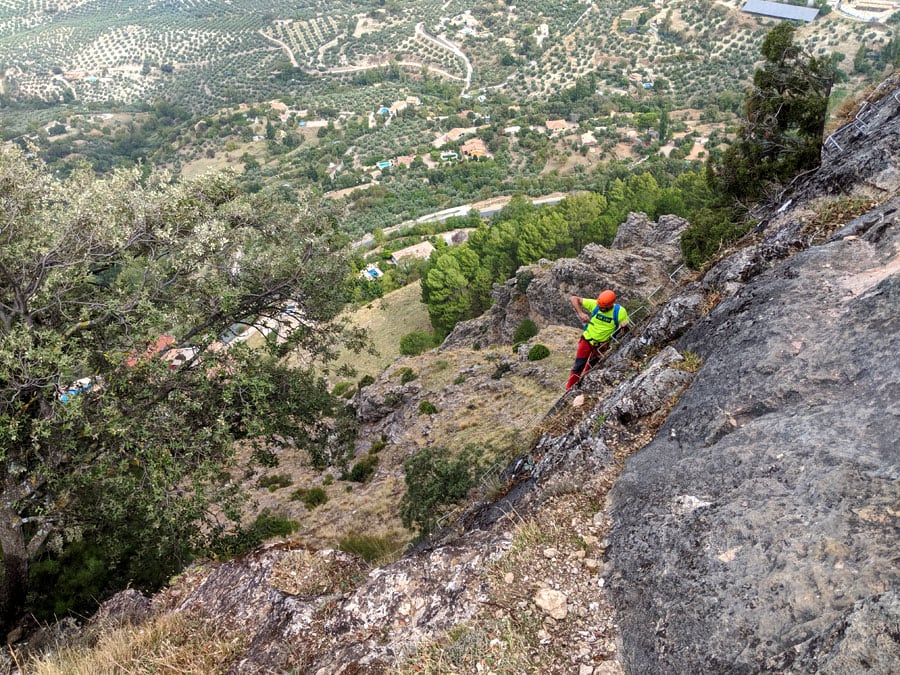
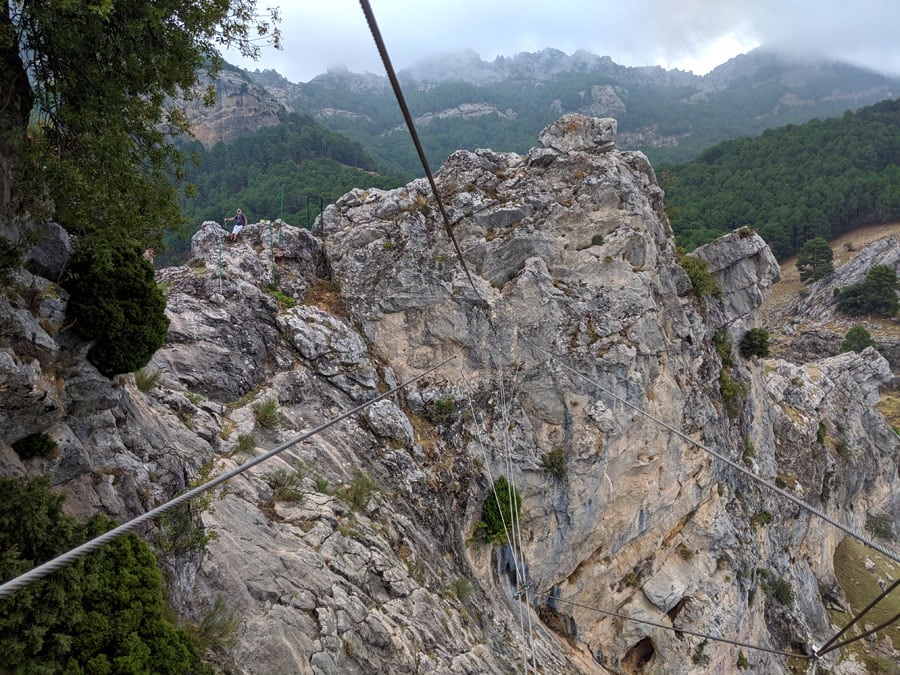
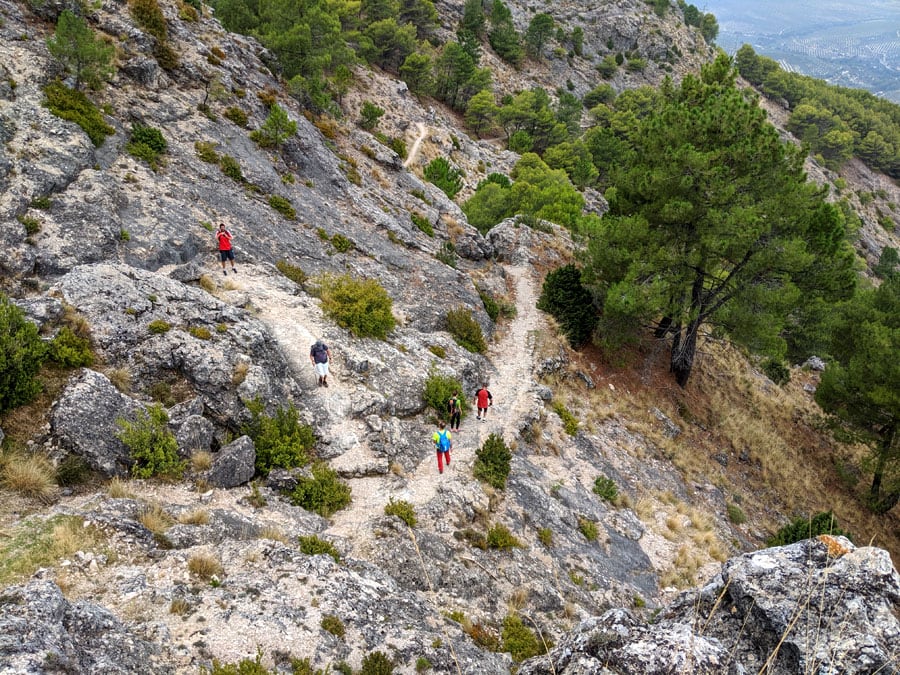
Once we leave this third section behind, we’ll get closer to the characteristic top cone of La Mocha and so also to the most exposed part of the via ferrata. We’ll find a couple of well-equipped vertical grooves, of 25 and 32 metres, before getting to the diversion of the two alternative ways at the Valientes pass (brave pass). If we continue up ahead we’ll take the difficult option. If we continue on to the right we’ll take the easy one, not very exposed and with no Tibetan bridge. It’s an accessible 160m alternative for those who have hiked this far.
If we feel like more, it’s worth carrying on upwards where the longest section, 69 metres, awaits us. It includes the vertical and quite exposed “Hormigas” pass, and the lateral flanking with two ladders, la campana, -Cágate Lorito style-, and a fun and small overhang. For someone who is doing a ferrata for the first time, this section will be a challenge and it was an excellent idea the builders had, even though it may be tough for those who are not confident enough. That’s why we strongly recommend making a good decision in the Valientes pass, and bear in mind that getting this far took courage already.
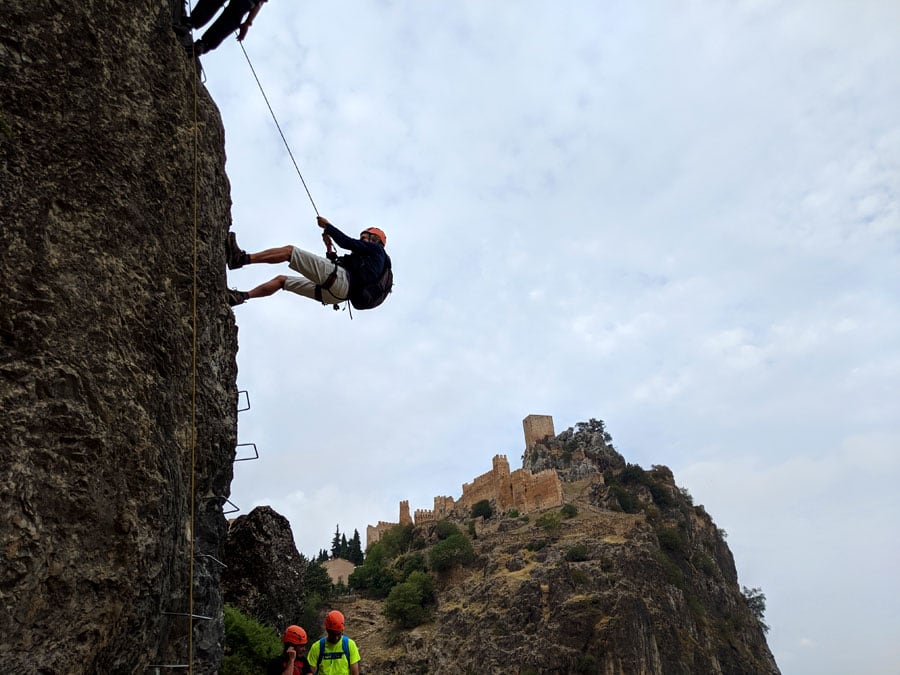
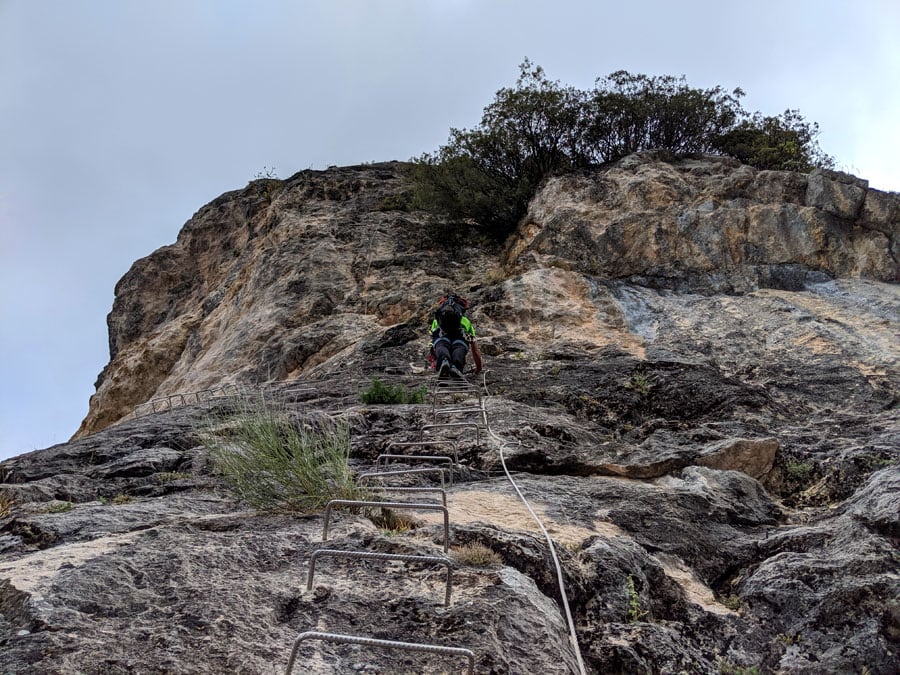
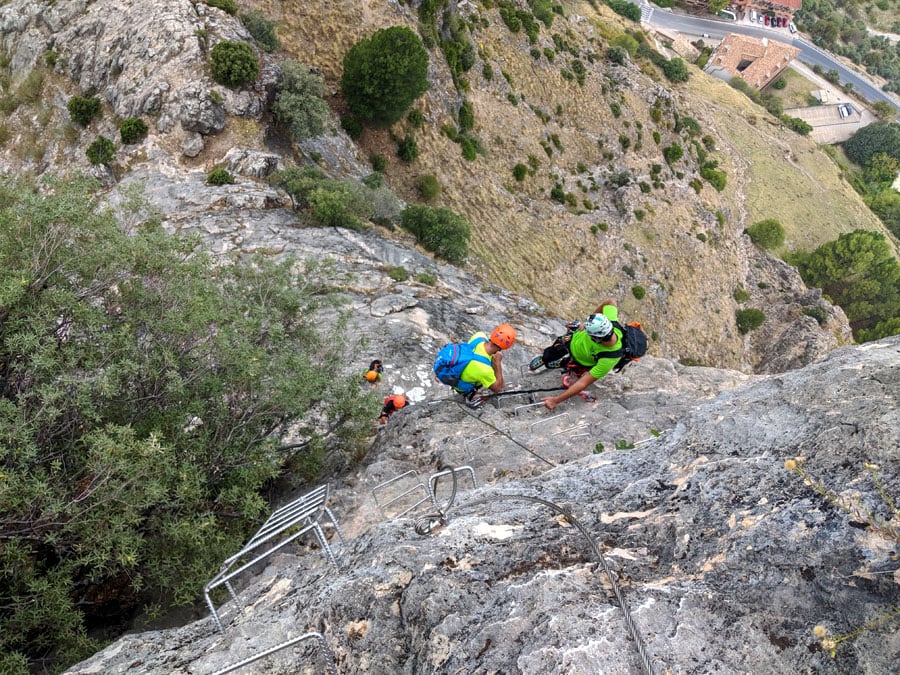
While we go up, we’ll see that the path turns into a strange upward slope. This is because they had to modify a stretch when the ferrata was being equipped. The original idea was to go up directly to the Mocha summit, which would have turned it into a very exposed section, but the poor quality of the rock meant that the builders had to rethink the final part of the route. We lost the exposure but we gained the flanking of the 51 metres along the northwest face that takes you to the Tibetan bridge. It’s not very exposed, but it’s a good ending all the same, giving us great views and extra excitement with the inevitable shaking of the cables. Just a side note: the lifeline is a tad too high, which makes us feel safe but also makes the progression a bit difficult if our cow’s tails aren’t elastic.
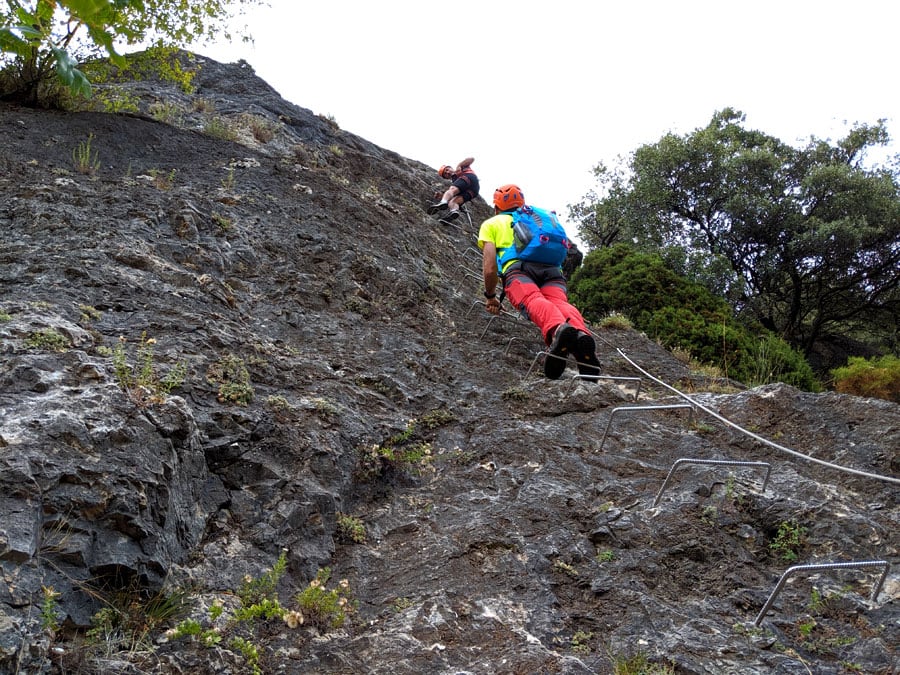
The sixth vertical sector -the most exposed-
We’ll come across the exit door of the vía ferrata after a short lateral stretch to the left of the bridge. It’s time for letting the experience sink in while we hike up to the Mocha summit, 70 metres west. This vía ferrata manages to convey emotions; it gives but it also demands, in equal measure. It’s a great route to break the ice in this vertical world, and it’s perfect to garner experience and confidence.
To finish, a side note about the construction expenses of the ferrata. 18.600€ were invested in it, a very tight budget which only covered the gear and the hours of work. It was funded by the Diputación de Jaén in the tourism promotion scheme of La Iruela. Either way, it’s not only geared towards at promoting tourism; the goal is to make it accessible to local entities and federated hikers. The price for the latter is 7€, and the local and regional sports clubs only pay 5€.
Ultimately, a very good idea that deserves our support with a visit: you’ll leave as pleasantly surprised as we did, and if you have a discount, even more so.
View of the 40-meter Tibetan bridge from the end of the via ferrata
Video summary
Video summary of the via ferrata path
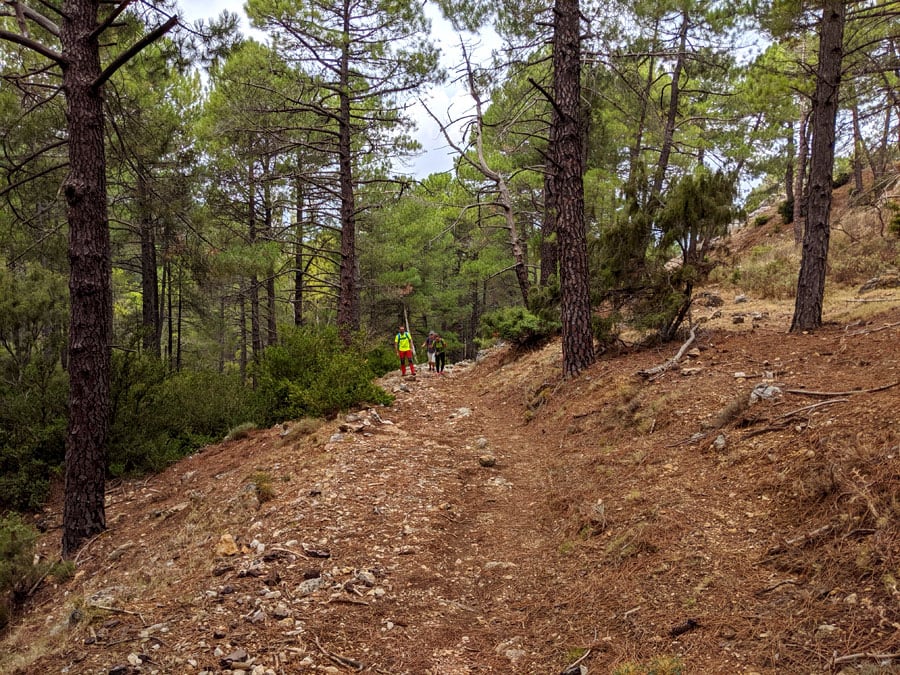
The way back
We have two options here:
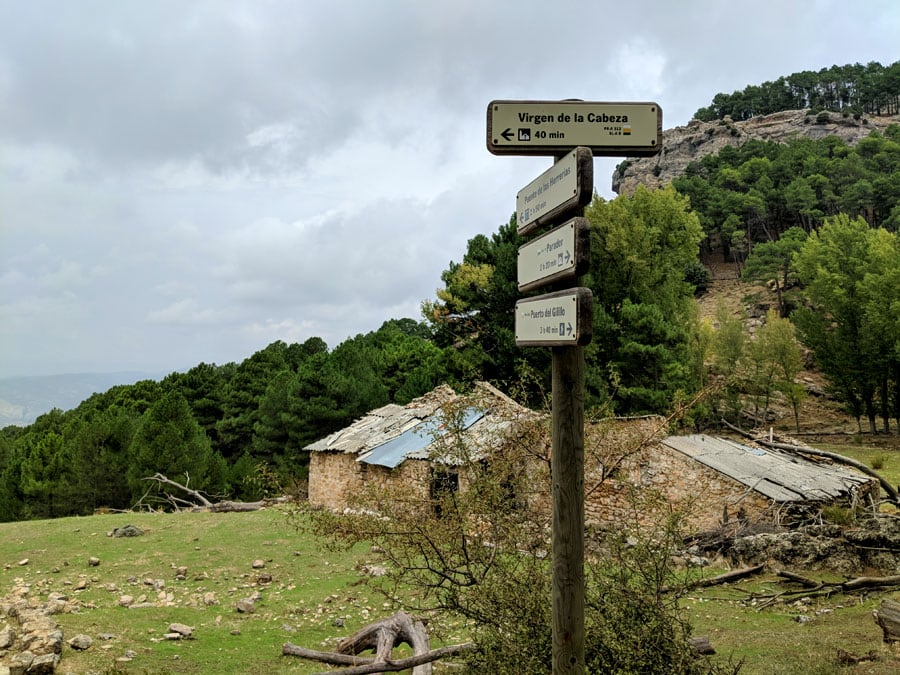
» Once we go through the door of the via ferrata, we can continue the Sendero de las Ánimas, that meanders down the way to the left, curving north. In around 20 minutes walking in zigzags, we’ll get to the beginning of the vía ferrata.
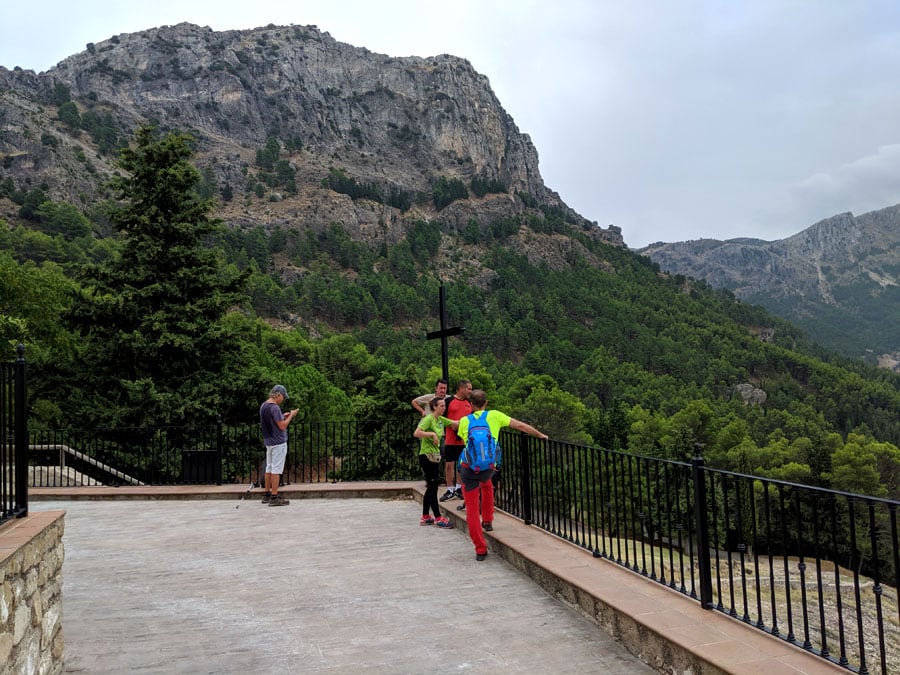
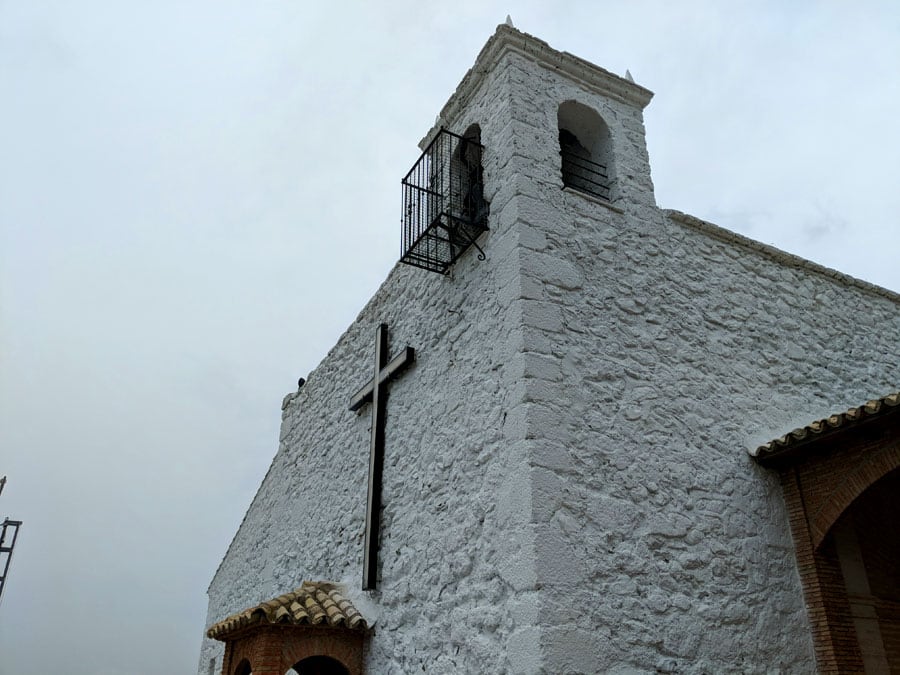
» The longest option follows the path on the right, curving southeast, that slopes up to meet a section of the GR-247, that goes along the old cart path that belongs to the Prado Redondo forest house, set in a woody area on the outskirts of La Iruela. The path takes you to the Virgen de la Cabeza chapel, a good viewpoint of Cazorla, and descends to the medieval Arabic castle and La Iruela municipal swimming pool. An hour-long hike in total.


