 Full list of equipped paths
  Via ferrata
 Equipped path
 Equipped section
 Equipped canyon
 Via cordata
 Via cable
 Trails
 Bike routes
 Blog
Blog All photos
 Mountain guides
Ok
11-06-2012 deandar
No status information for the last 9 months. Add status alert
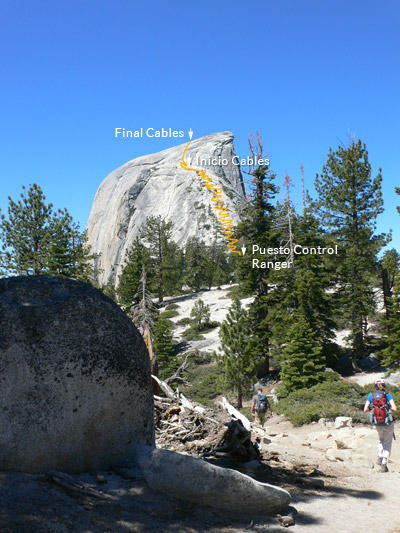
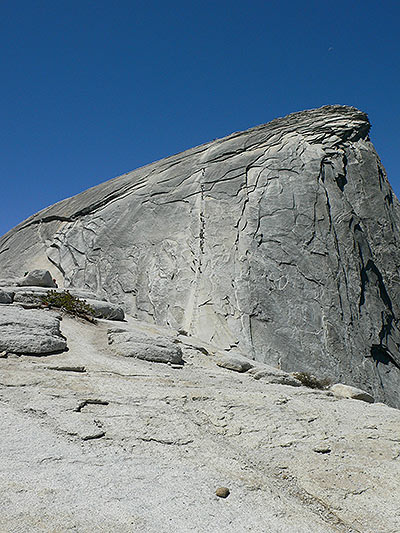
Equipped path Half Dome cable route | Yosemite
This path to the summit of Half Dome is one of the jewels of Yosemite Valley. The last 200 metre cable route is the final touch to the hike.
K3USAEquipped path$11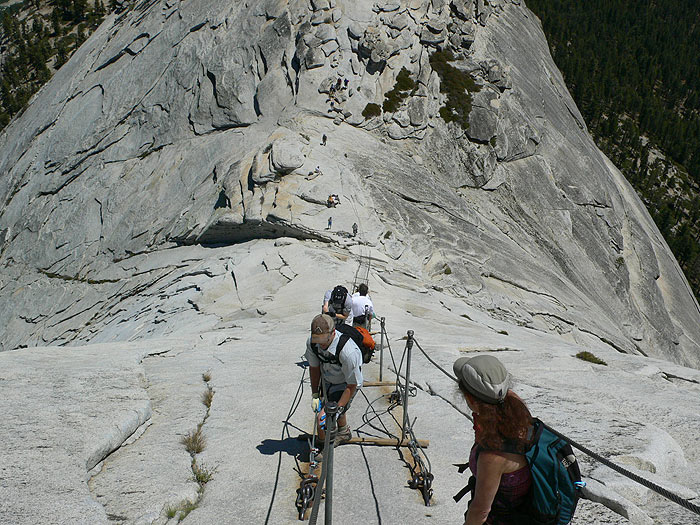
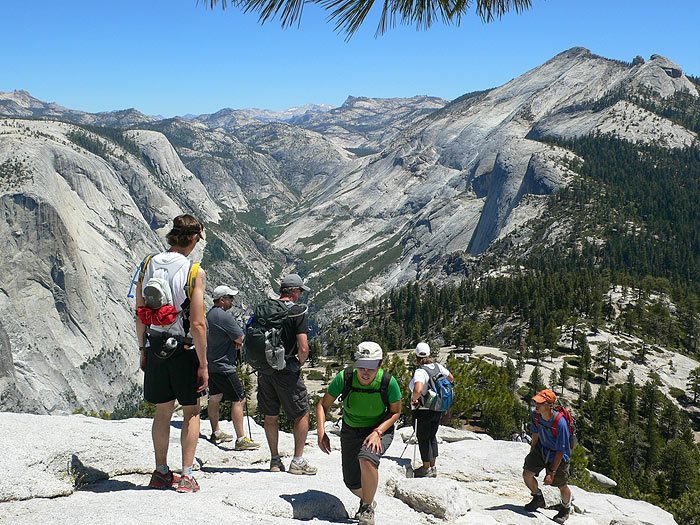
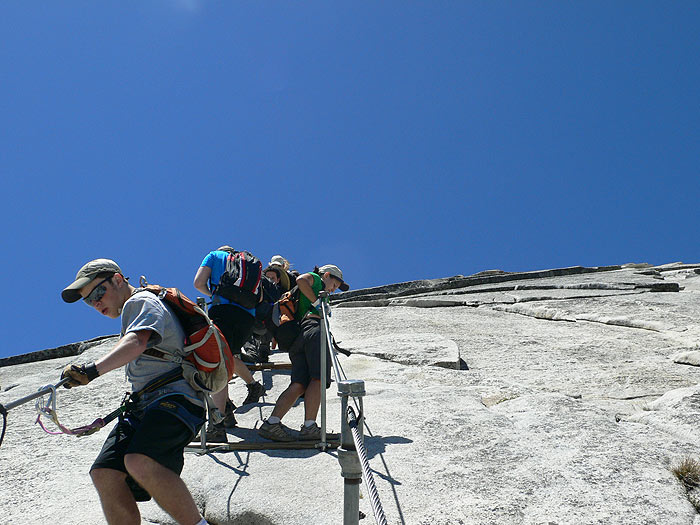
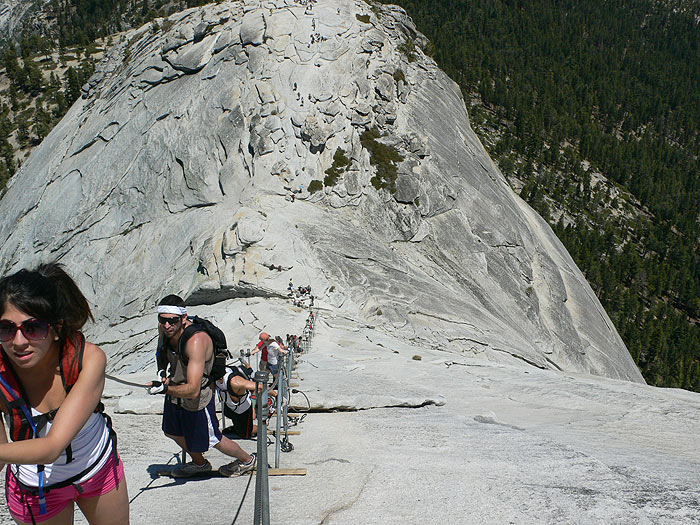
Looking back at the beginning of the cable section


Location
MariposaMariposa CountyCaliforniaUSA Technical description Route status
  Type
Type  Access Time
 4 h. 50'
 Route duration
 27'
 Return duration
 3 h. 50'
 Length of Equipped Section
 200 m.
 Total Distance
 29 km
 Equipped Ascent
  Total Level Difference
 1.450 m.
 Desplomes
 0
 Bridges
 0
 Zip line
 0
 Rope
Rope No
 Beginners
 No
 Child Friendly
  Private
 $11
 Orientation
 Northeast
 Season
 De Mayo a Octubre
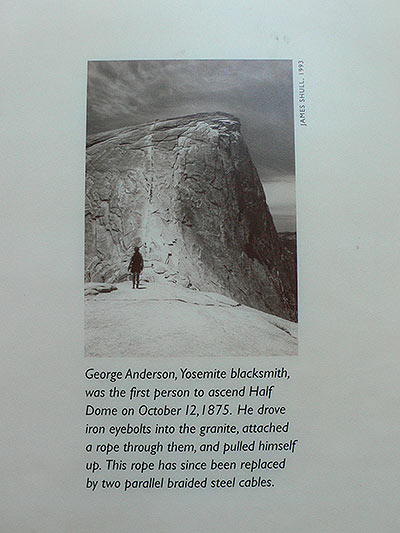
- Sierra Club
- Year: 1919
- @contact
How to get there
Yosemite Valley has four main entrances: Big Oat Flat -Hwy. 120- in the north; Arch Rock -Hwy. 140- in the west; Tioga Pass -Hwy. 120- in the east and Wawona -Hwy. 41- in the south.
It’s almost impossible to get accommodation in a campsite or a refuge in Yosemite in peak season without a reservation, so you should consider a daily commute to the National Park from a nearby town.
We stayed overnight in a campsite by Bass Lake, 1.5 h from the valley and close to a small town, Oakhurst, equipped with all services. Our entrance door to Yosemite was Hwy. 41 by Wawona, which is perfect if you want to visit the Mariposa Grove Giant Sequoias. We had to get up very early the day we visited Half Dome so we decided to move closer and stay at White Chief Mountain lodge, on Hwy. 41 and an hour’s drive from Yosemite.
Once in the Valley we should leave the car at the parking lot near Curry Village or at the side of the road if that’s not possible. The best option, though, would be parking near the Happy Isles, the path exit, because the closest parking areas are shut in peak season. Here you’ll find information about all the entrance options to the park and all the ways you can access it with public transport.
Getting closer
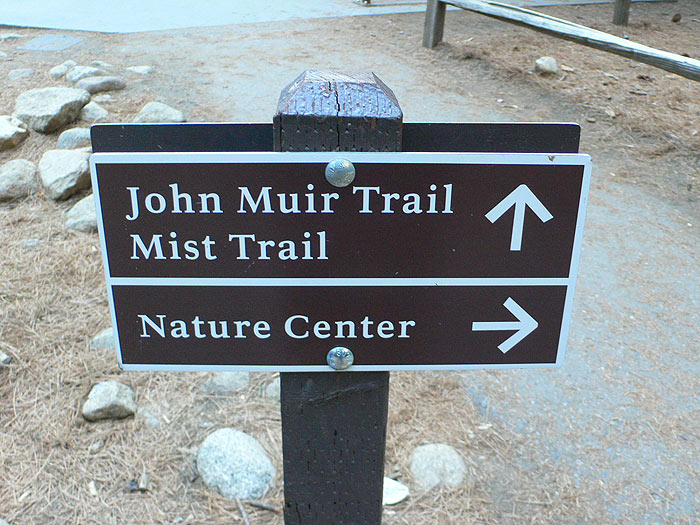
We’re approaching the beginning of Mist Trail, walking through very basic plastic sheds and camping tents between Curry Village and the Upper Pines area.
Now we’re grateful we didn’t stay at any of these places, since Hanta Virus started wreaking havoc around that time in 2012, leaving three dead people and setting off an international outcry which affected 39 countries.
The route
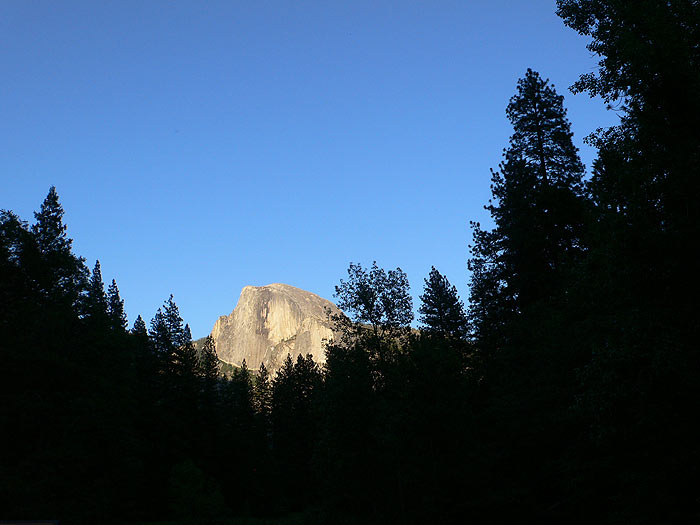
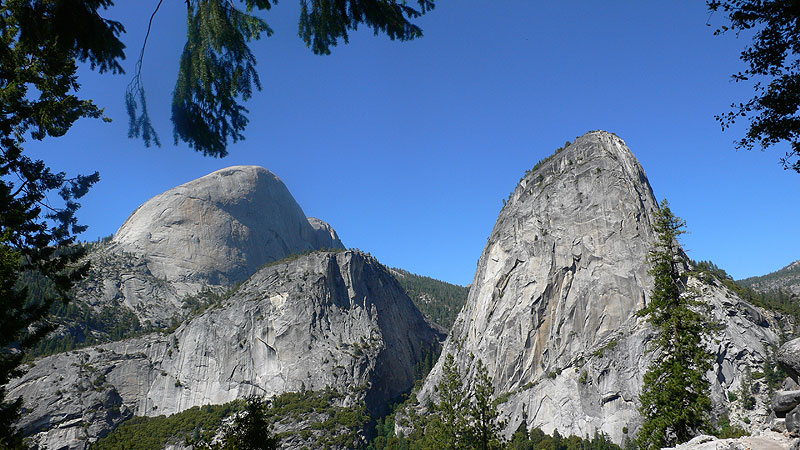
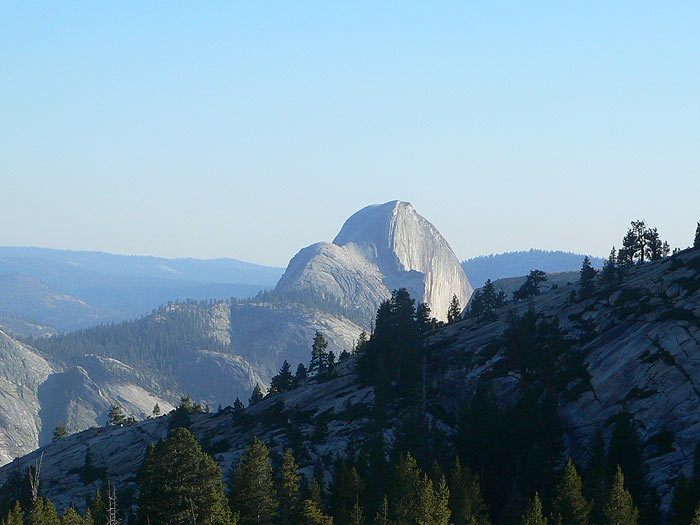
View of Half Dome from Yosemite Valley
The first thing we do right after stepping on Mist Trail is pinching ourselves to check we’re not dreaming and that we’re finally heading to Half Dome. Not only is it a dream come true, but also a real stroke of luck. Being able to go up the granite top is becoming harder due to the restriction measures, narrowing with every passing year. Access used to be free, then it became crowded and a weekend permit was required. Nowadays you need a permit for every weekday.
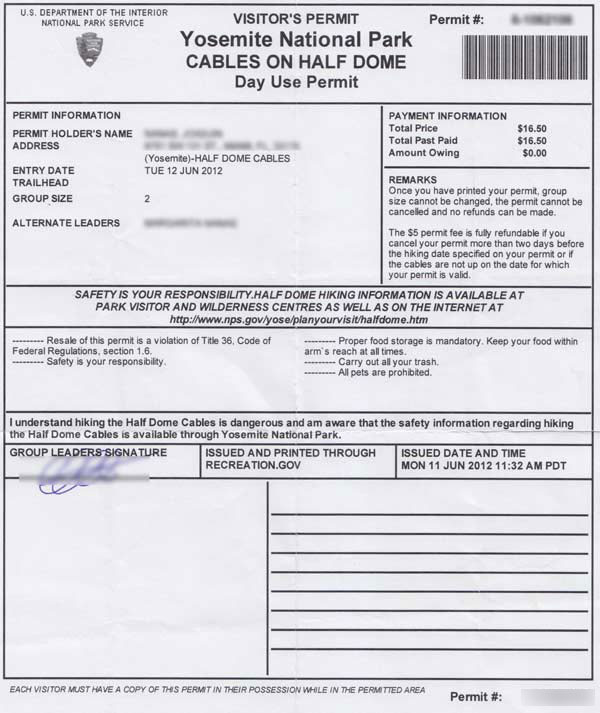
300 hikers manage to get it; 250 of them asked for it months in advance and the remaining 50 are given in a daily lottery. Saturdays are the worst winning option; Wednesdays and Thursdays the best one.
We tried twice, a Monday and a Tuesday, which was our lucky second opportunity, since we got the permit. We had to pay the non-refundable lottery fee both times, 5$, and needless to say, the permit itself, 8$ per person -2012-.
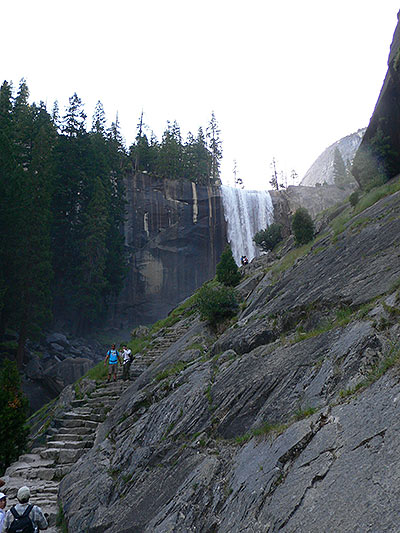
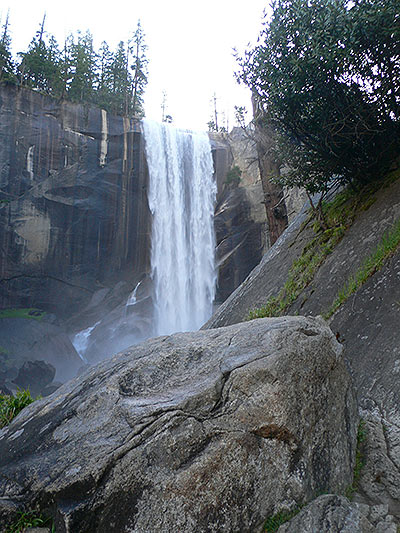
We start our hike a bit earlier than 8 AM, later than what the park organization recommends. There aren’t that many people but we do see various groups hiking up the meandering Mist Falls path. Some have the same objective as we do, others just walk around to behold the spectacular falls in the area, a proper hike in and of itself. Visual inputs are continuous and stopping and contemplating the first of the falls, Vernal Falls, is inevitable. There’s a thin mist soaking everything, and we can’t help but taking out our cameras, even knowing that we still have almost the whole route ahead of us. On this first stretch we go up a narrow canyon that Merced River opens between Glacier Point, a stunning viewpoint, and the Liberty Cap promontory. The stepped ascent is hard and it’s protected with handrails in some stretches. We can manage it at our own pace, there’s no rush.
There’s a third group of hikers, the Thru-Hikers. We cross paths with a group of boys that are just leaving the John Muir Trail, carrying big backpacks, fishing rods, pots…and looking all scruffy after days of hiking. It would be a dream come true to join them!
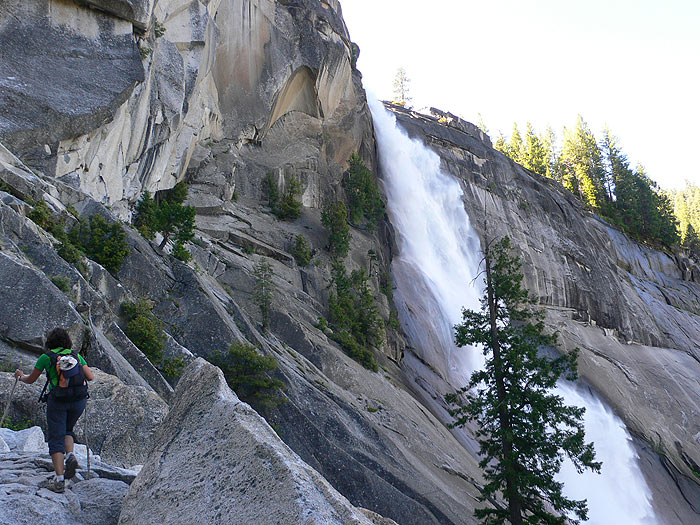
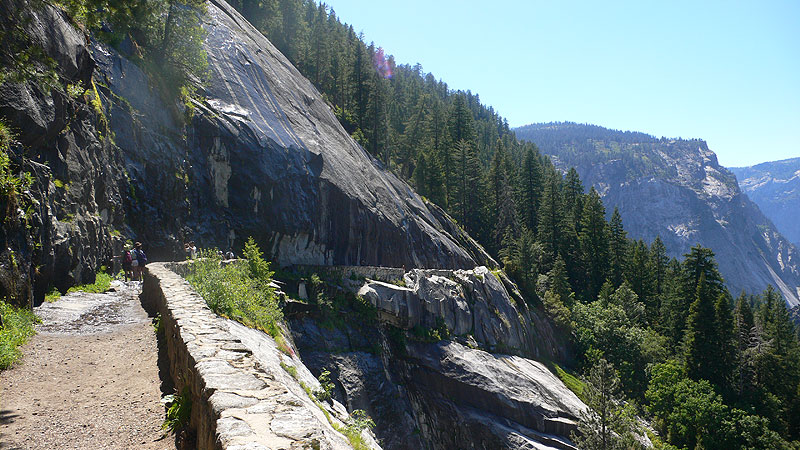
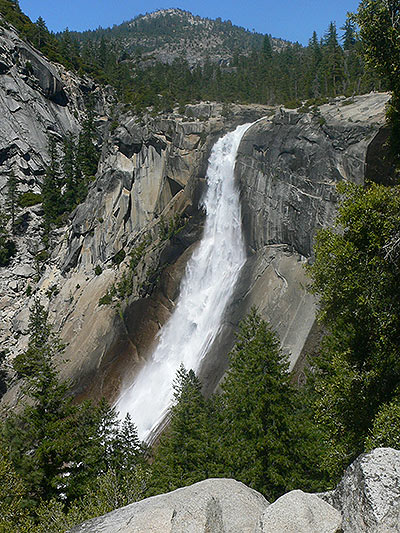
The path meanders close to Nevada Fall
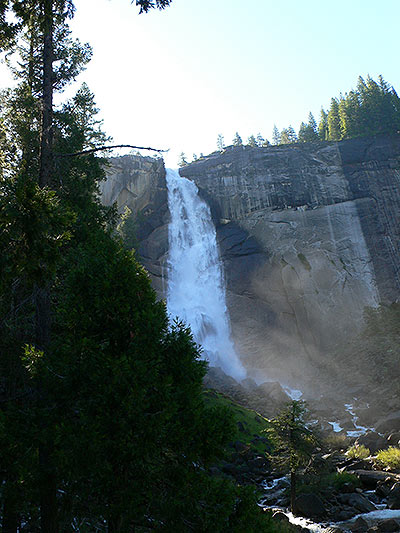
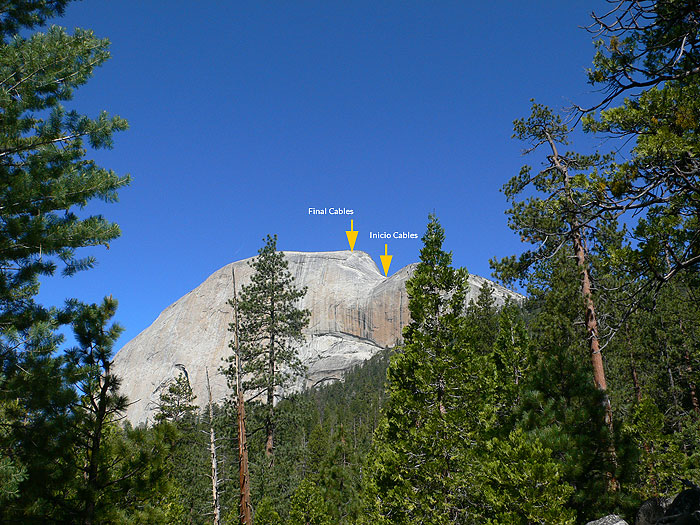
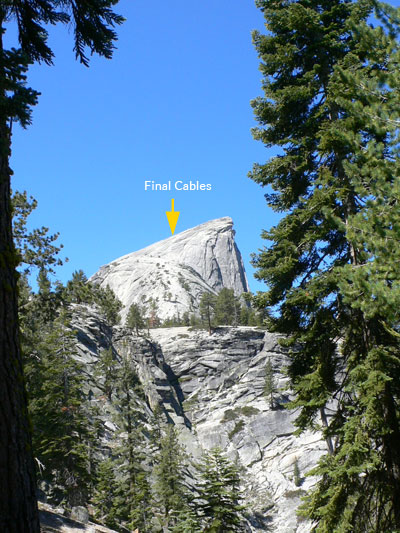
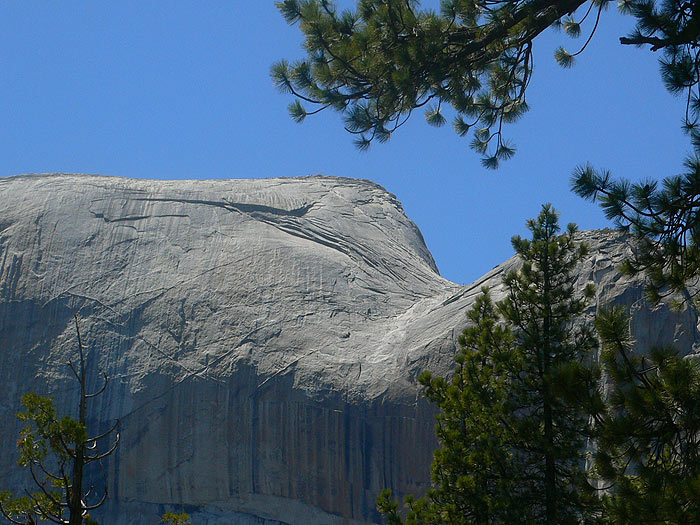
We continue our way to Nevada Falls, the biggest of the falls in the canyon. Its presence tells us that the entrance to Little Yosemite Valley is near. This is one of the few flat stretches on the whole route, and we can already see the omnipresent shape of Half Dome to our left. A thin white line on the granite helps us intuit where the cables are. It’s very impressive from this side.
Southeast view of Half Dome -you can already make out the ascent cables-
One of the park guidelines advises splitting the hike into two days; it’s not strictly necessary but it’s a good recommendation. Right in Little Yosemite we find the “wild” campsite -no toilets- to stay overnight. You need a permit to stay here, the Wilderness Permit, given without draws but very difficult to get due to the high demand. It’s a quiet place by the idyllic Merced River that makes very beautiful and peaceful meanders here. We have just enough time to go up and down, so we don’t even consider the option.
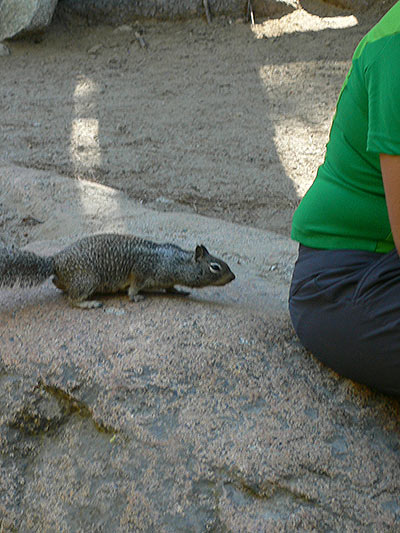
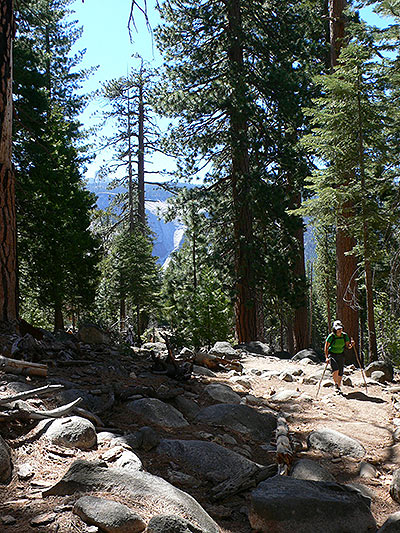
We continue hiking up after leaving the diversion to the campsite, this time through the forest, heading to Tuolumne Meadows. At this point we have turned north slightly, looking for the northeast face of the mountain. The ascent is long but manageable; we stop to have lunch and the squirrels show up right away. Among many other things, it’s forbidden to feed the wildlife, even squirrels, but they are so insistent that they always end up filling their bellies a bit too much. We had been warned, but we had a bag of chocolates stolen from us by a very well- trained family of groundhogs that took the loot while we were spaced out for a moment. We even saw others fighting to get their backpacks back, so be warned: beware of these cheeky rodents.
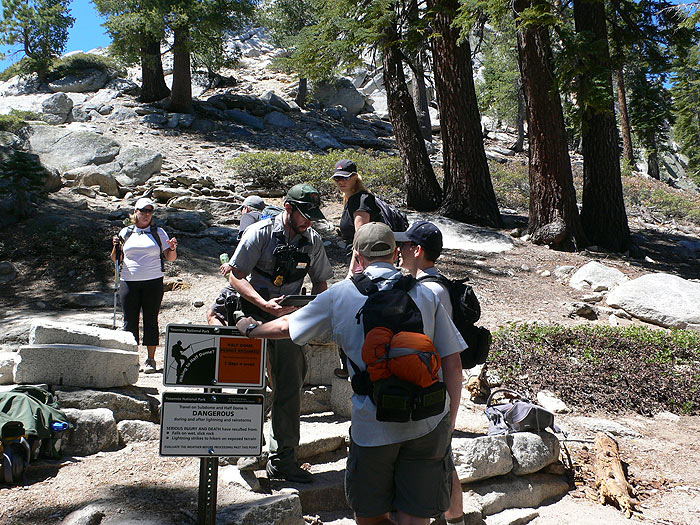
An armed park ranger controls the access permits with his iPad
Well, we still have a good stretch ahead of us after that… The forest starts opening up until we bump into the official access gate to Half Dome, a post where a ranger controls the access. We get there at around 12 PM, and we see some very surprised people without a permit not being allowed to enter. The park ranger works thoroughly, with a database on his iPad, which contrasts with a bulky gun. We have to say that he wasn’t at his post at 2:30 PM when we got back down; maybe he had to take care of an emergency.
Well, the park ranger gives us some basic advice and checks our IDs. The quick word exchange becomes bittersweet when he makes us feel safer by assuring us that if any problem arises he and his team will take care of it, but also goes on to enumerate all the potential problems we might encounter during our ascent. He also goes over our stuff and we’re surprised to see how much stress he places on our equipment being very well tied together. Why, we ask? Because one of the lesser-known dangers on this cable route isn’t falling down, but actually something falling on you. A hiking stick or a canteen can do lots of harm if they were to roll down onto an unprevented body at the base of the cable route. He finishes the recommendations with an Enjoy! We feel ready, or at least that’s what we think.
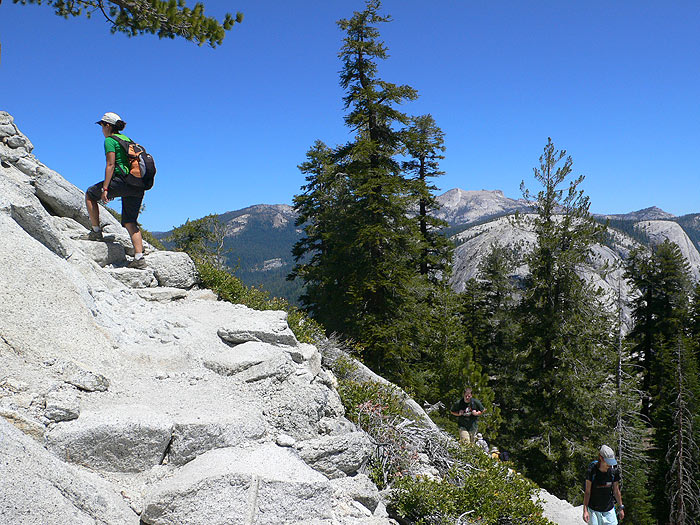
The climb is exhausting but the landscape gives us a thousand excuses to take a break
We face the most physically difficult section: a long ascent up a staircase cut into the rock. Making it straight through with no breaks is out of the question for most of us. Besides, the amazing views that we progressively gain around us are the perfect excuse to stop. Early bird hikers are already coming down while we’re still fighting to climb up with some dignity.
The cable route
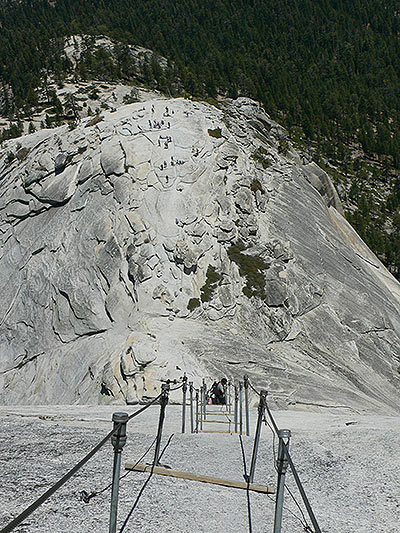
Beholding what awaits us.
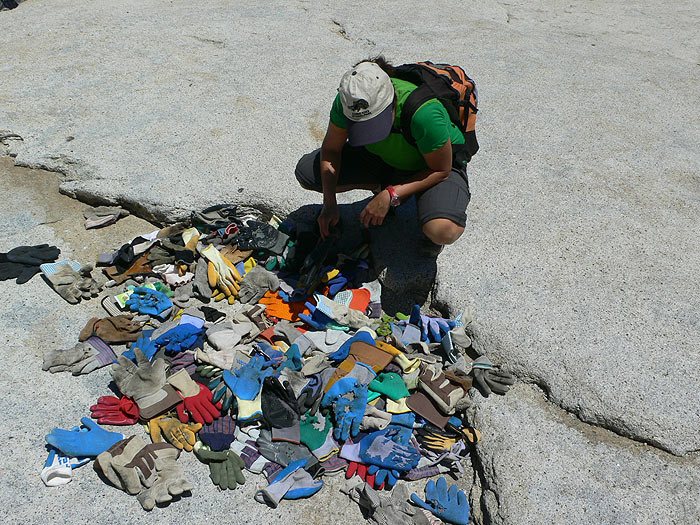
Gloves are a must anyway, but especially on the way down -we didn’t carry any with us but were able to find a good pair among the ones other hikers leave after the route-
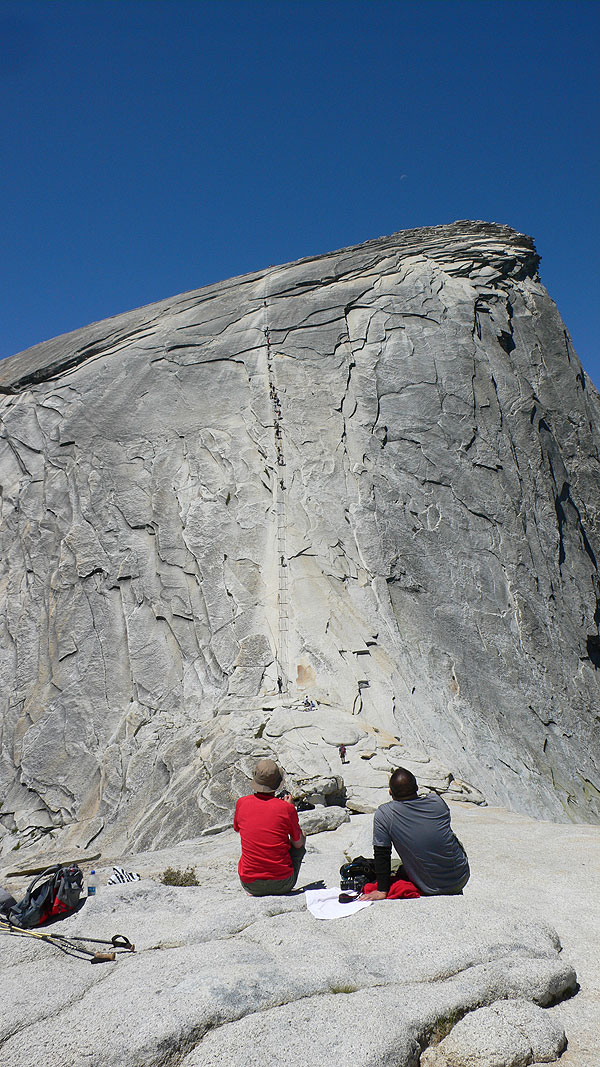
We finally reach the foot of the cable route. We start measuring up what awaits us: if we had brought our vía ferrata gear with us it’d have been better. Why didn’t we bring it?
What we didn’t think to bring with us are gloves, either: a must to protect your skin from abrasion. We’re lucky to see that other hikers leave their used ones when they’re done with the route and we can choose from the best ones in the pile. They’re of great help indeed, especially on the way down.
The progression on cables isn’t as easy as one might think. We have to take long steps to support our feet on the wooden boards. These, joined to the vertical posts, are what make up the path, and these in turn form the long handrail, attached to the cables. The rock is quite slippery and the wooden boards are essential to secure every footstep and keep moving up. We understand now why the route is closed on rainy days: besides the lightning bolts, the wall is far too slippery. You can even struggle in dry conditions: we came across two people that decided to continue barefoot because they were slipping too much. It's an option.
We spot a hiker secured like you would be in a ferrata, in the most vertical section -jealous-
Once at the top we feel like it was worth all our efforts: lotteries, bad nights sleep, hours on the road… everything is behind us.
We see all kinds of people on our way down: parents with their 10 year-old kids; one even with a newborn in his backpack; older people and all sorts of hikers, ranging from the pros and those who aren’t quite sure how they ended up here.
Fortunately, the regulation worked because now there aren’t long queues to go up and you don’t have to wait behind anyone to finish your hike. You can always move ahead past someone, asking first of course, and with those already coming down it’s easy to agree on who goes first. Patience will be needed though, since it’s not uncommon to come across someone blocked by fear.
The most difficult stretch going uphill is a short section where you have to go up on a ledge: there are few grips and it’s a bit slippery. The last steps on the cable are easy because the wall starts leveling off.
Almost at the top -the last cable stretch levels off a bit-
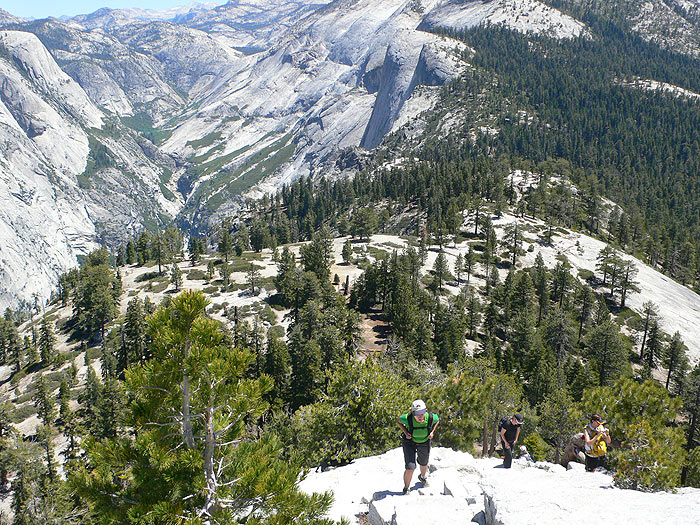
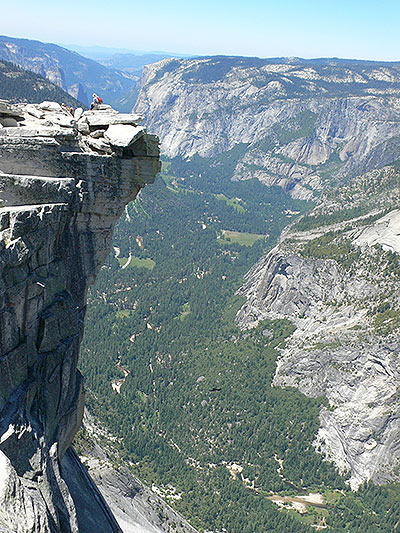
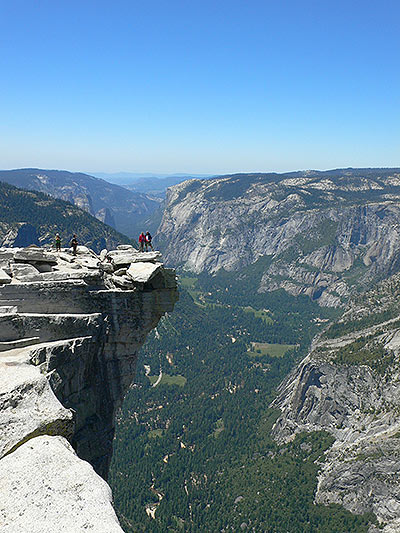
We go up to the right and soon reach the summit of Half Dome, 2,693 metres high and 1,400 metres over Yosemite Valley. We can’t help but take the epic photo at The Visor since, even though it makes our hair stand on end, it’s the proof of our ephemeral visit here. Like we said already, this is the moment you have to keep an eye on groundhogs and their natural charms, although between the excitement and the stunning views it can be tricky. The top is spacious and comfortable. You can walk up to the western face and explore endless views of Yosemite. If we’re lucky we’ll see a climber hit the summit.
We feel satisfied and very fortunate despite all the bad nights’ sleep, lotteries, kilometres on the road.... It’s all behind us now and it was absolutely worth it. Happy after having overcome the challenge -what must a climber hitting the summit feel? and in free solo?- we start our descent slowly, enjoying every step; we’re only half way at this point.
Bye bye Half Dome, bye bye Yosemite. When will we meet again?
Video
Video of John Beede, ascent to the Half dome in 3 hours and 16 minutes.
The way back
The way down is the same as the way up, using the cables: a more delicate operation -if possible- than the climb up.
We retrace our steps down to the diversion to John Muir Trail. It’s a longer way down but it’s well worth walking on this legendary trail. We’ll also enjoy the amazing views of Nevada Falls that we saw only from below on our way up. Everything is well signposted.
The last section is shared with horse riders: if we’re the unlucky ones, we won’t be able to walk past them until they take a private path.
Bibliography
Yosemite Valley | National Park Half Dome Cables Half Dome Day Hike Half Dome Permits Historia del primer ascenso Half Dome | Wikipedia Historial de accidentes en Yosemite y Half DomeNearby routes
Last comment
Hola César, en la web de Permisos del parque tienes toda la información y requisitos: ...
deandar.com wrote 12 years ago
More equipped paths
Posts about via ferrata
Beginners Security Equipment Theory and technique Bolting a ferrataTop
Baumes Corcades 8.5Cascada del Sorrosal 8.8Cala del Molí 8.5Pasarela de Espeja 9.0Teresina 8.1Newest routes


Leave a comment / Status Alert
5 Comments
Hola César, en la web de Permisos del parque tienes toda la información y requisitos:
http://www.nps.gov/yose/planyourvisit/hdpermits.htm
Para entrar en el sorteo vía web puedes hacerlo aquí:
http://www.recreation.gov/permits/Cables_On_Half_Dome/r/wildernessAreaDetails.do?page=detail&contractCode=NRSO&parkId=79064
Para el sorteo vía telefónica este es el número:
877/444-6777 puedes llamar de 7 de la mañana a 9 de la noche. Te pedirán una tarjeta de crédito.
Que tengas mucha mucha suerte!
Buenas. Vamos esta semana para YOsemite y no sabemos donde hay que ir para conseguir el sorteo diario. Por teléfono? Por la web? O hay que presentarse en algún sitio? Espero vuestra respuesta. Gracias de antemano :-)
Gracias Enrique, cuando tengas ocasión de hacerla ya nos comentarás, seguro que no te decepciona.