 Full list of equipped paths
  Via ferrata
 Equipped path
 Equipped section
 Equipped canyon
 Via cordata
 Via cable
 Trails
 Bike routes
 Blog
Blog All photos
 Mountain guides
Ok
11-08-2014
No status information for the last 9 months. Add status alert
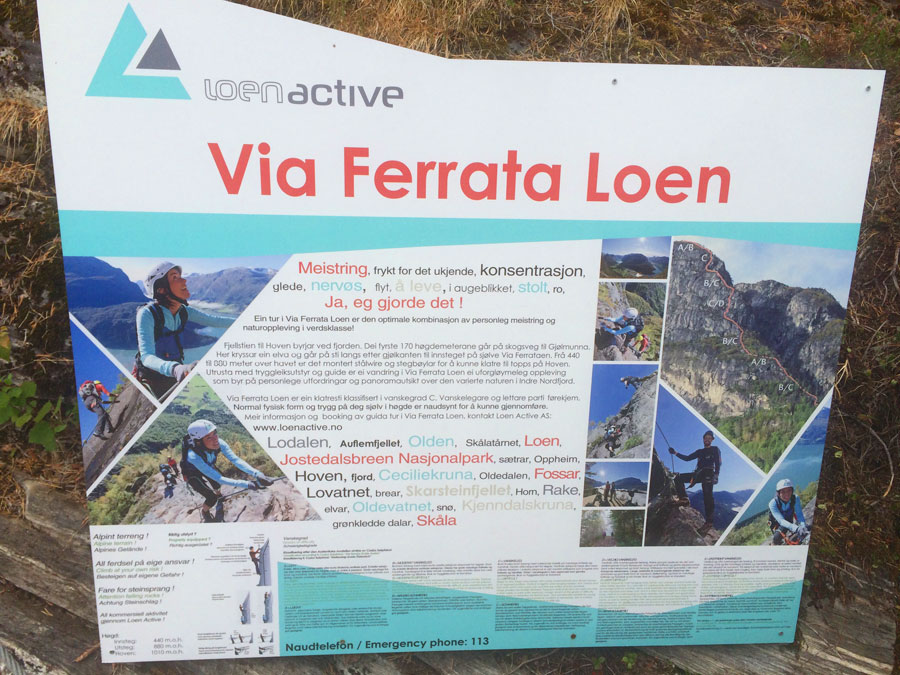
Via ferrata Loen
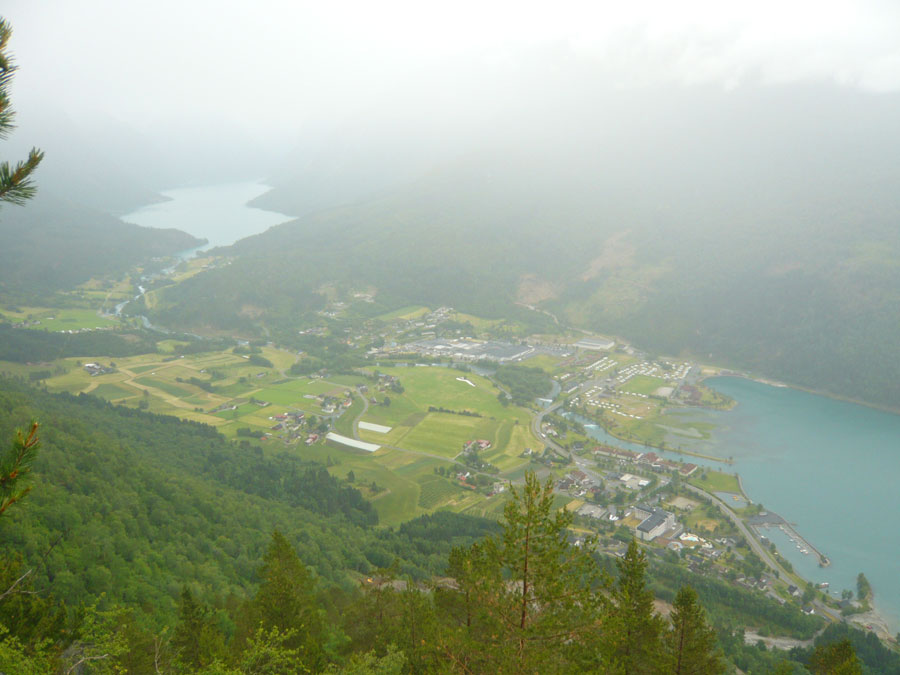
Norwegian via ferrata with great views of the Innvikfjorden fjords. We will hardly find artificial holds like stemples to help us progress up the wall. The star of the route is a high walkway.
K4NorwayVia ferrata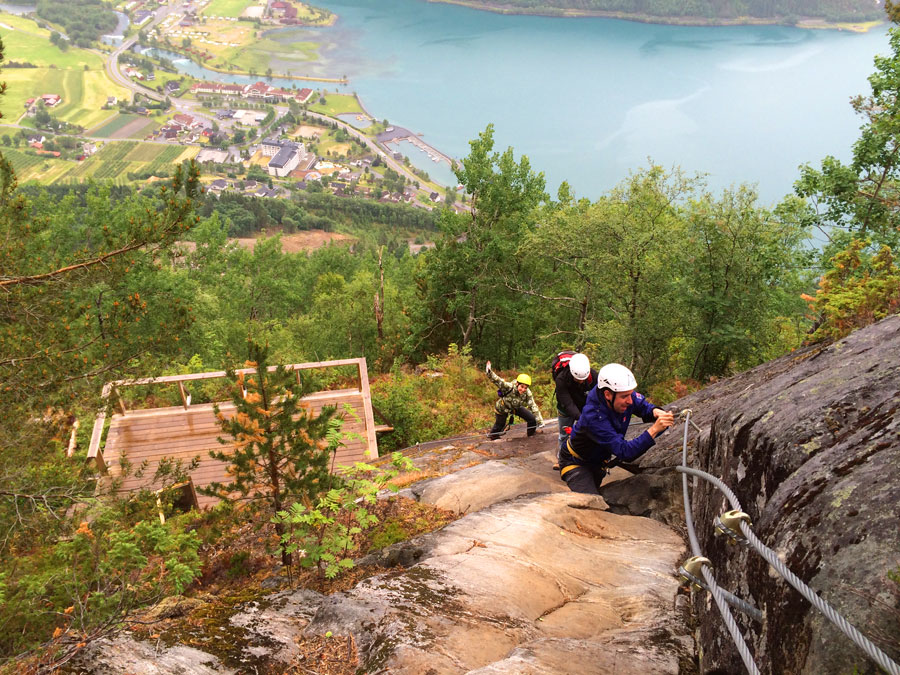
6 ® Richie Riko


Location
LoenSogn og FjordaneOeste de NoruegaNorway Technical description Route status
  Type
Type  Access Time
 1 h. 20'
 Route duration
 2 h. 40'
 Return duration
 1 h. 40'
 Length of Equipped Section
 850 m.
 Total Distance
 7,5 km
 Equipped Ascent
 440 m.
 Total Level Difference
 1010 m.
 Desplomes
 0
 Bridges
 1
 Zip line
 0
 Rope
Rope No
 Beginners
 No
 Child Friendly
  Private
 No
 Orientation
 South
 Season
- Loen Active
- Year: 2012
- +47 57 87 58 00
- @contact
How to get there
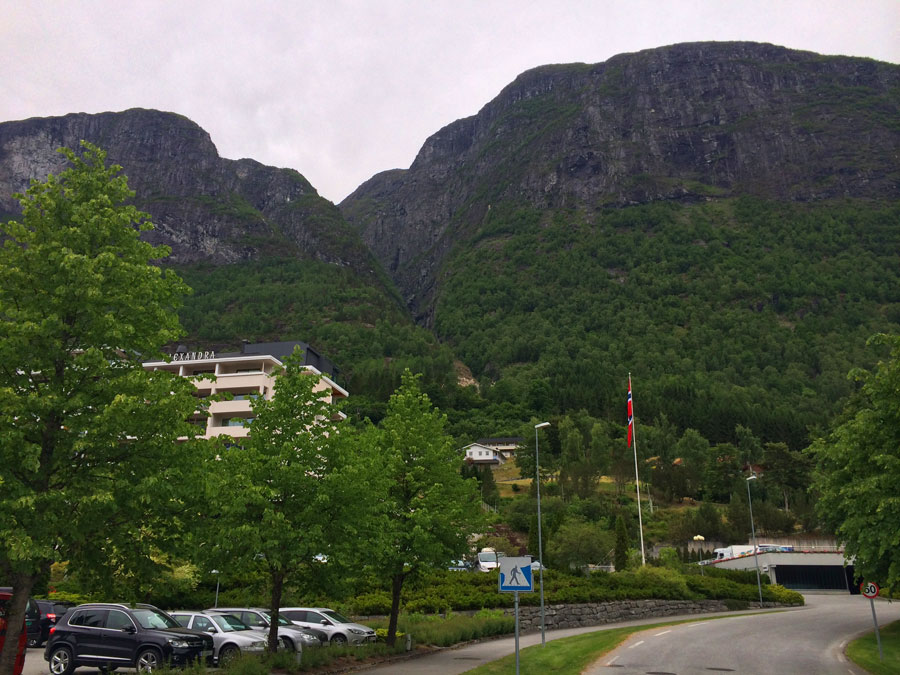
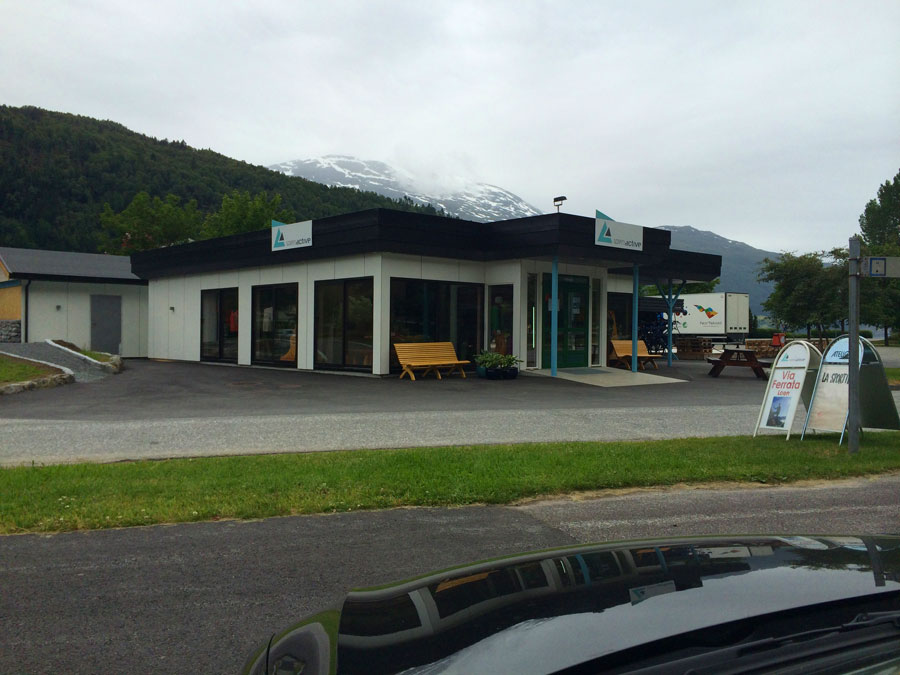
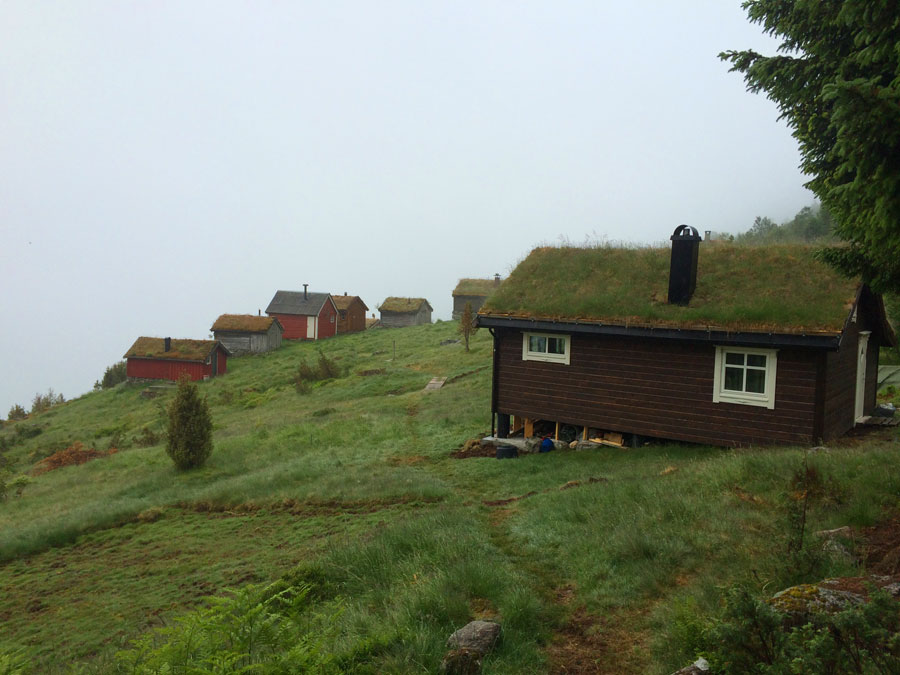
We should get to Loen, in the Innvikfjorden fjords, between the towns of Olden and Stryn, and head to the Alexandra Hotel. Right after taking the diversion to the hotel we can turn right and leave the car in the parking lot in front of the shop Loen Active. Here we’ll be able to rent the gear for the ferrata: helmet, harness and climbing sink all for 400.00 NOK (50.00 euros). They also have gloves and footwear if necessary, and also a guide service at a cost of 950.00 NOK per person.
If the shop is closed you can ask at the hotel reception. As you can see, the prices are quite high, although you don’t pay for the use of the via ferrata. We brought all our gear from Spain, but unfortunately KLM lost our baggage and we had to rent everything for the four of us.
Getting closer
We’ll take the main road, 60, towards Stryn after setting off from the parking lot. We’ll drive for around 200 m up to a bridge over a stream and we’ll cross it. Here we’ll take a forest track to the right -drive slowly because it starts really steep-. We’ll continue up and into the valley of the stream we just crossed. We’ll take a path to the left, in the opposite direction we were driving in, marked with a vertical rock similar to Obelix’s menhirs. Works were going on when we visited the area because they were reinforcing the stream valley with big stone blocks, so maybe you’ll find it changed. You should see a walkway with wooden steps at the beginning of the route that tells you’re on the right path. We’ll walk up to a rocky section with a thick cable that we’ll use to help ourselves get over it. This will give us an idea of what awaits us, since the route is not your typical via ferrata and there are hardly any stemples, bolts or any other artificial aids for climbers. We’ll carry on along the path up to around an altitude of 450 m, where we’ll come across a wooden deck that marks the beginning of the route.
The route
® Richie Riko
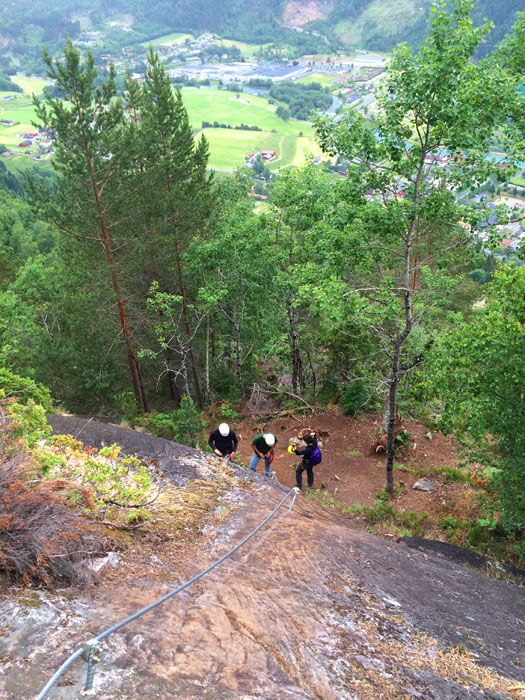
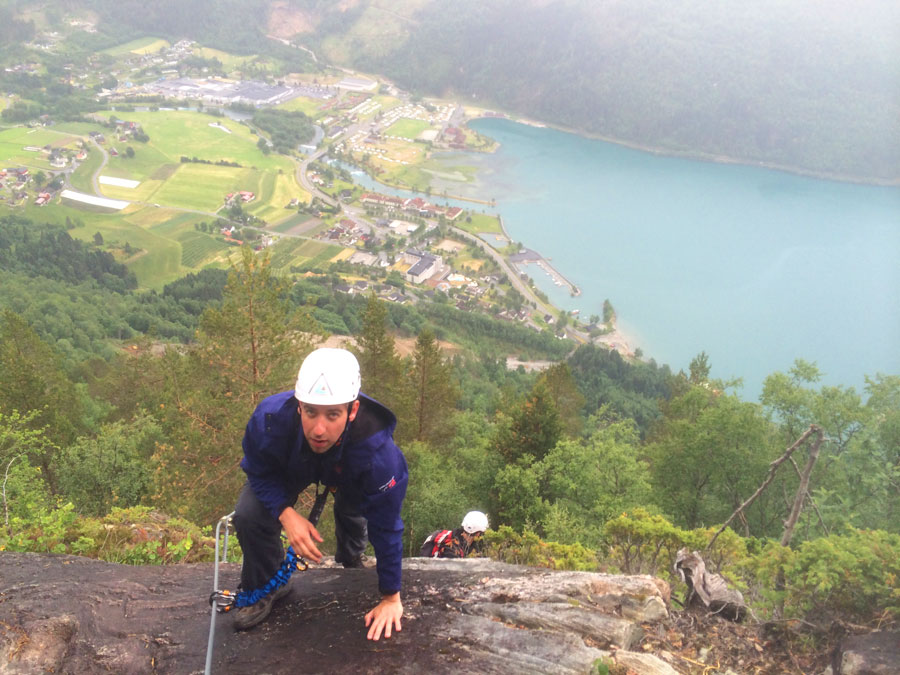
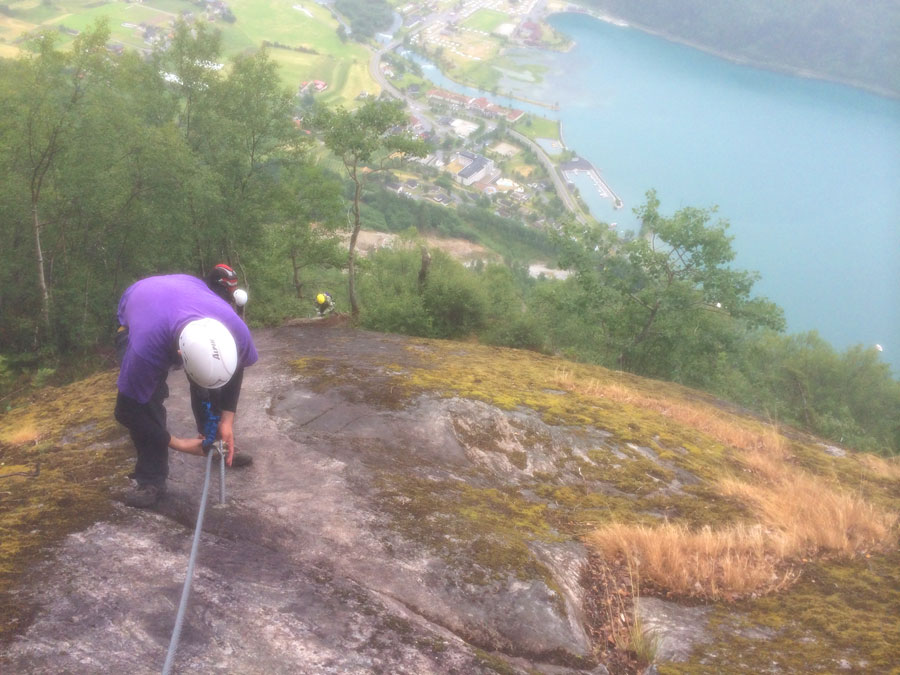
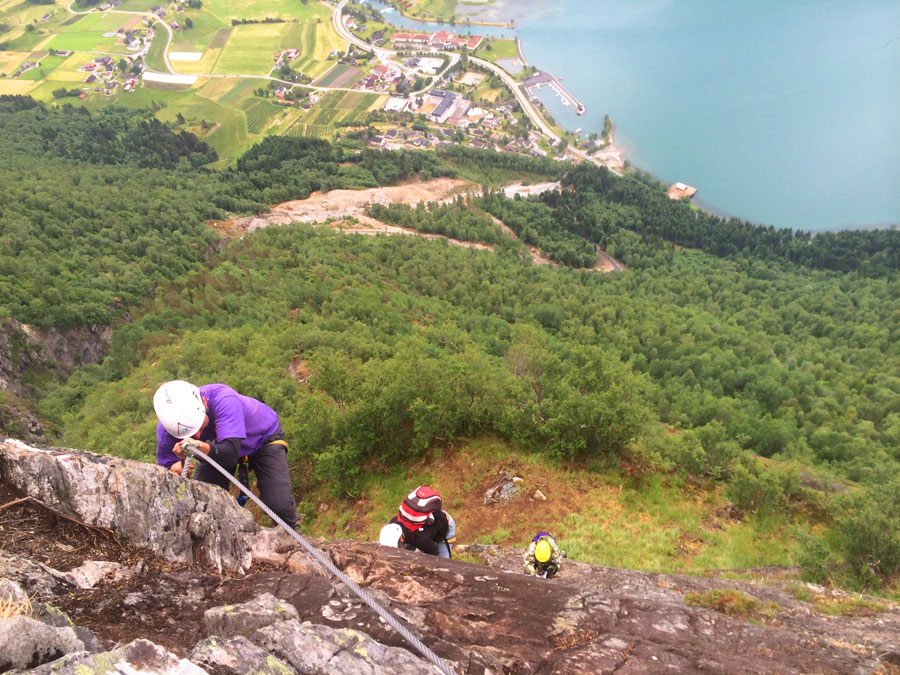
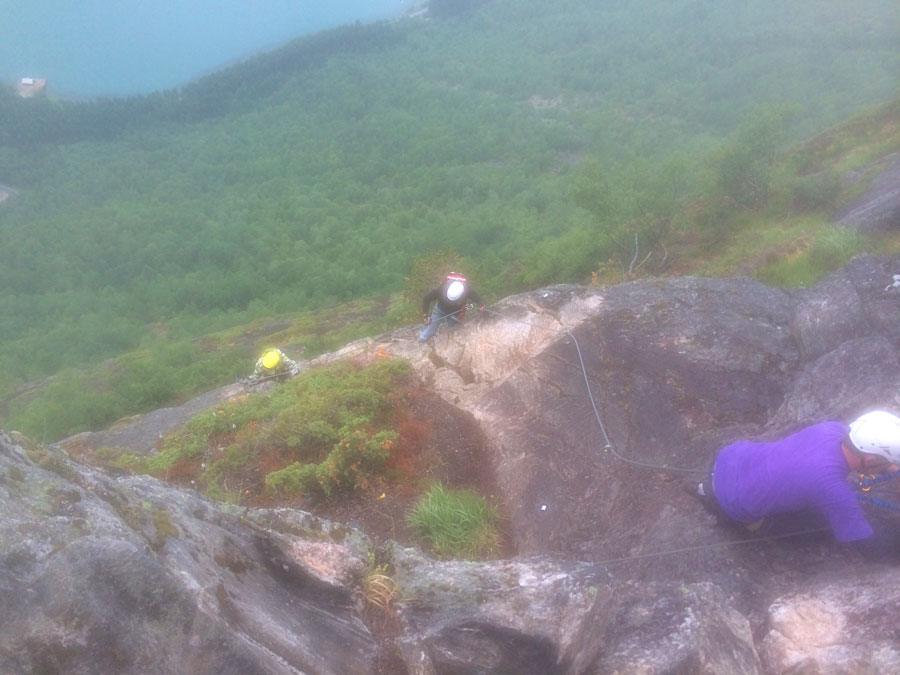
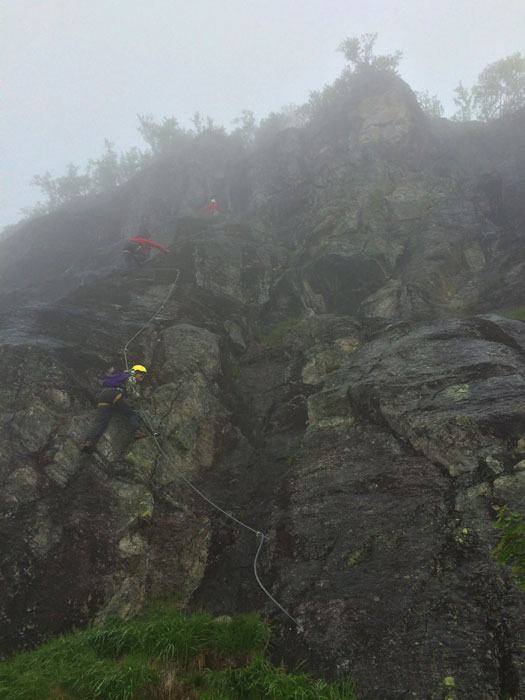
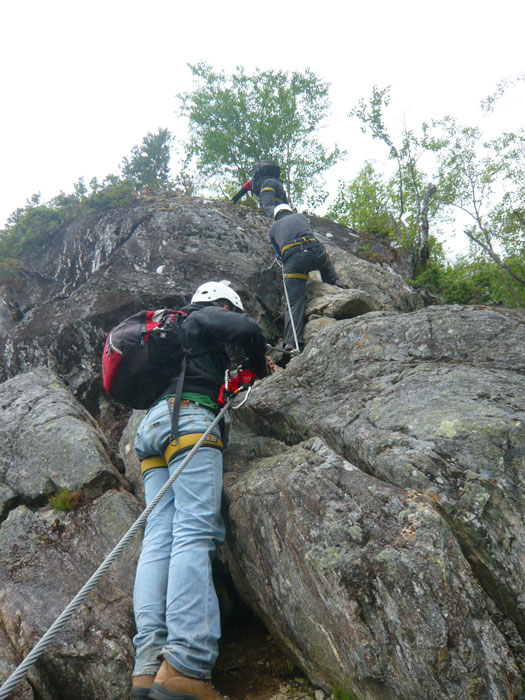
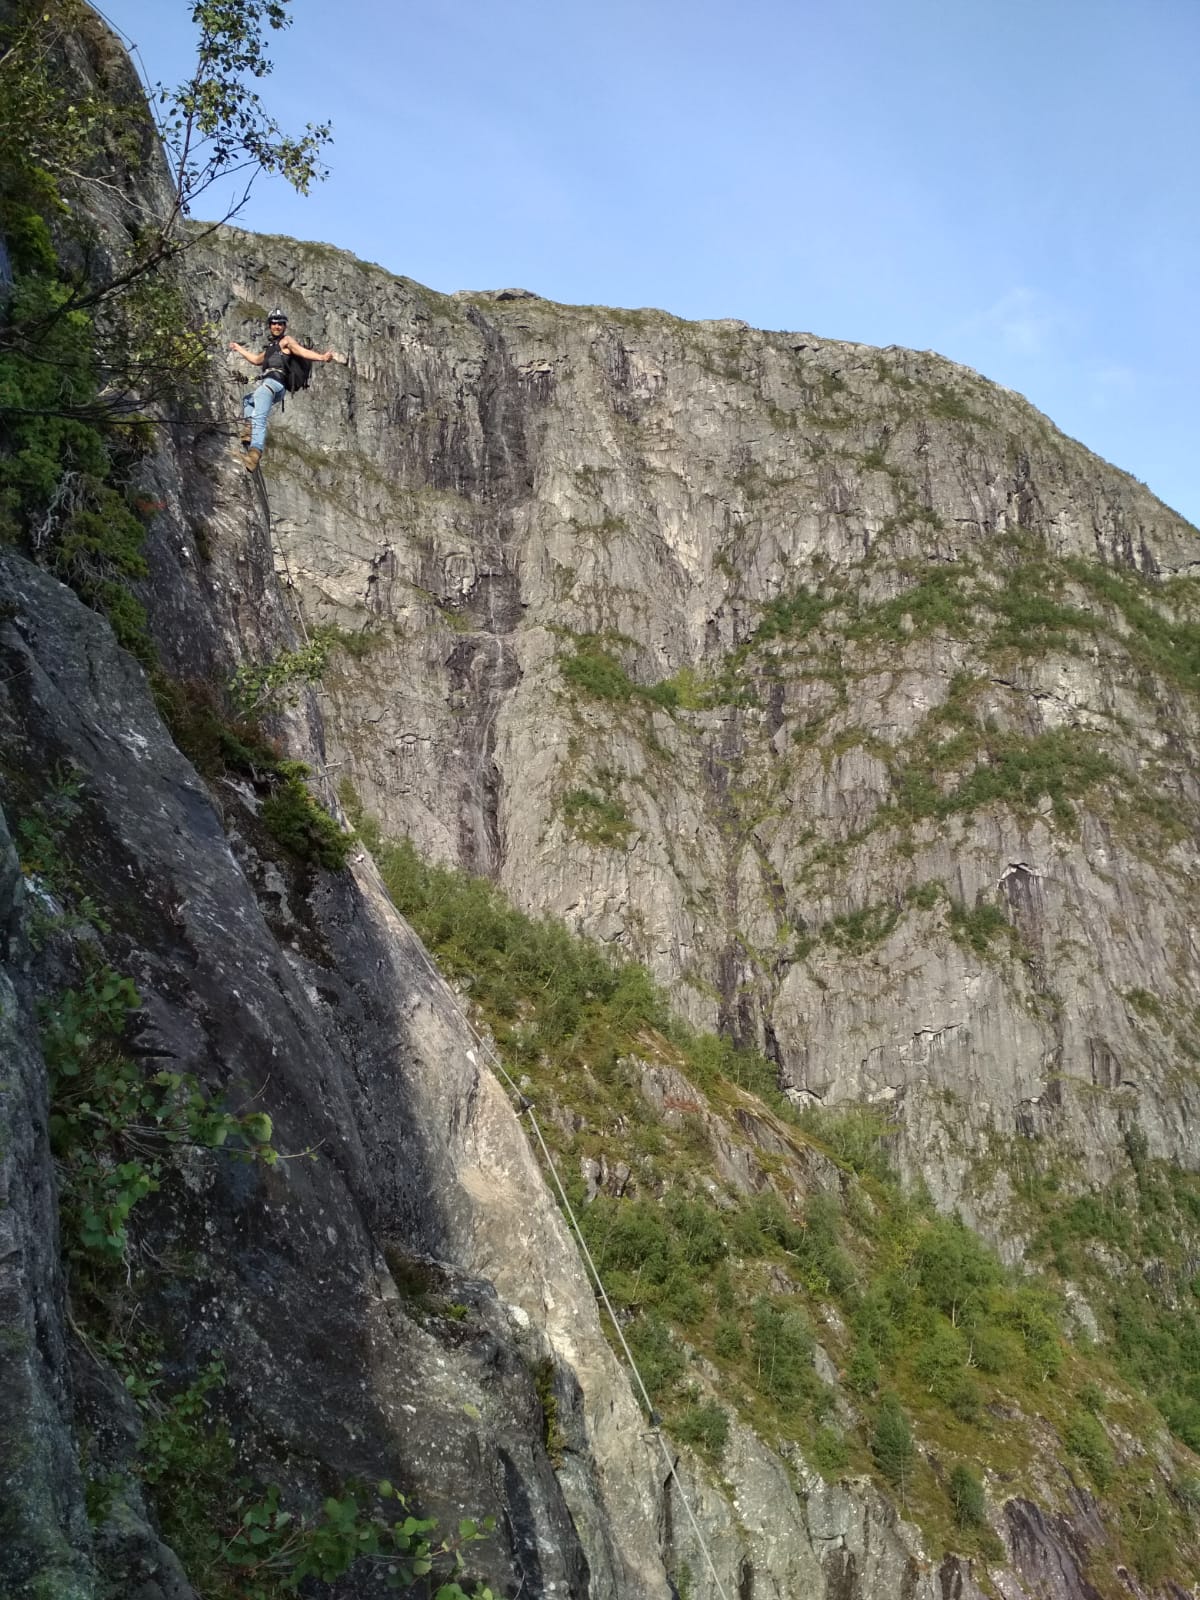
The via ferrata, if we can call it as such -with its scarcity of stemples, bolts or any other equipment to help us progress up the wall, as we’ve mentioned already- begins at a wooden deck with an indicative signpost and a postbox for donations. Here we’ll be able to make use of a thick cable to help us move on, especially if the rock is damp and slippery from the rain, like in our case. I personally found it awkward to have to use the cable at every step, and I recommend wearing gloves so your hands don’t end up like mince.
In the first 75 m we’ll go over a section that will pose no major difficulty, with vertical areas equipped with 3 or 4 stemples, interspersed with quite steep ones with only one safety cable (K3).
® Richie Riko
After this we’ll hike a 40 m section equipped with a safety cable (K2) that will take us to a similar stretch to the first 75 m we have already climbed, alternating between areas with a couple of stemples and areas with just a cable. On this stretch there are several spots where we can make use of much more comfortable natural grips than the cable (K3).
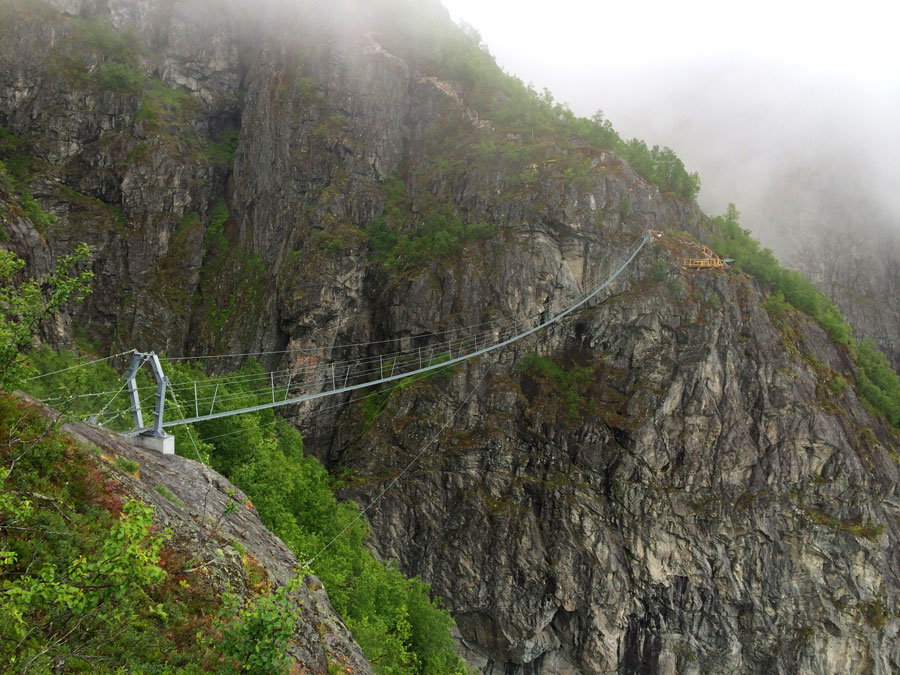
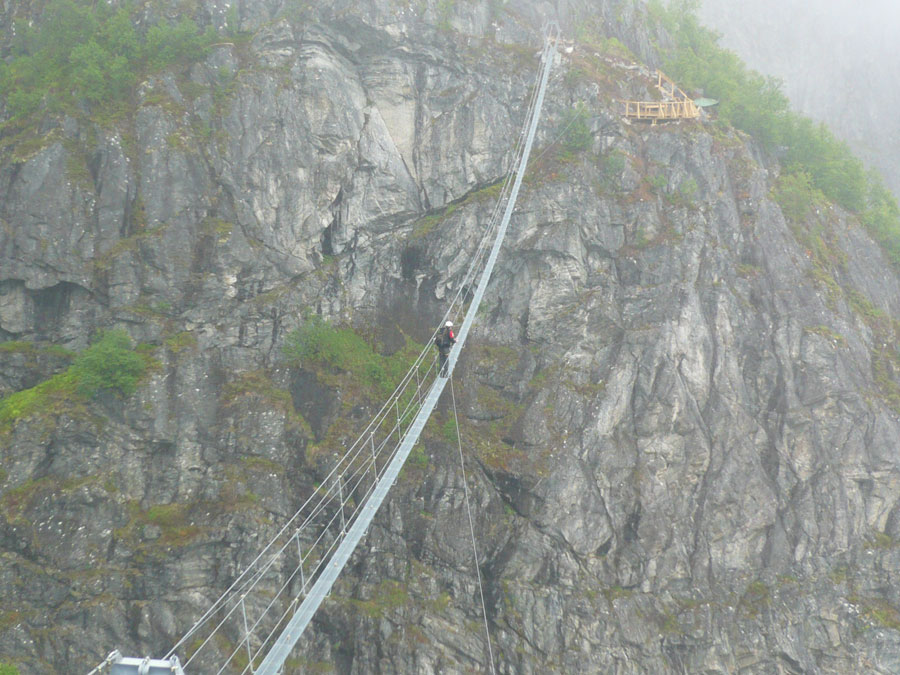
We’ll come across the most difficult section (K4) more or less halfway, although I found it much more comfortable because natural holds are more obvious. You can leave the cable for its real purpose here, safety, and start enjoying the ferrata by making use of the steps, cracks, ledges and other natural supports. This section, of about 100 m in length, gives way to the suspension bridge that we’ve been spotting all along and which has become progressively scarier.
® Richie Riko
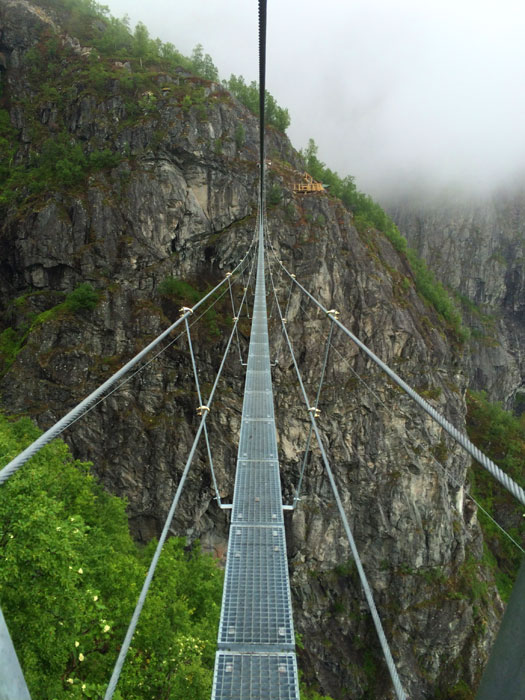
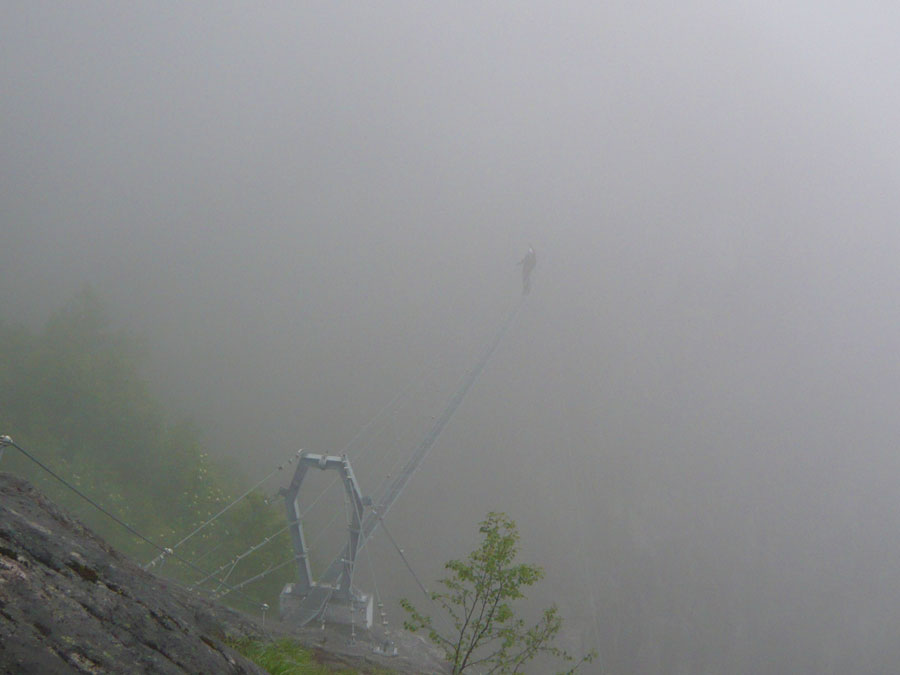
Close to the end, we’re given the opportunity of choosing a similar hike to the one we’ve done so far -following the safety cable alternating between some equipped stretches and unequipped ones (K3)- or crossing a 120 meter long, 900 metre high suspension bridge. This last option includes continuing the route on the other side of the valley, which turns into an equipped path. My companions didn’t dare to choose this last option, so I decided to cross it and come back across to have the experience, and then we all carried on along the main route we were tracing. This is the best option in my opinion.
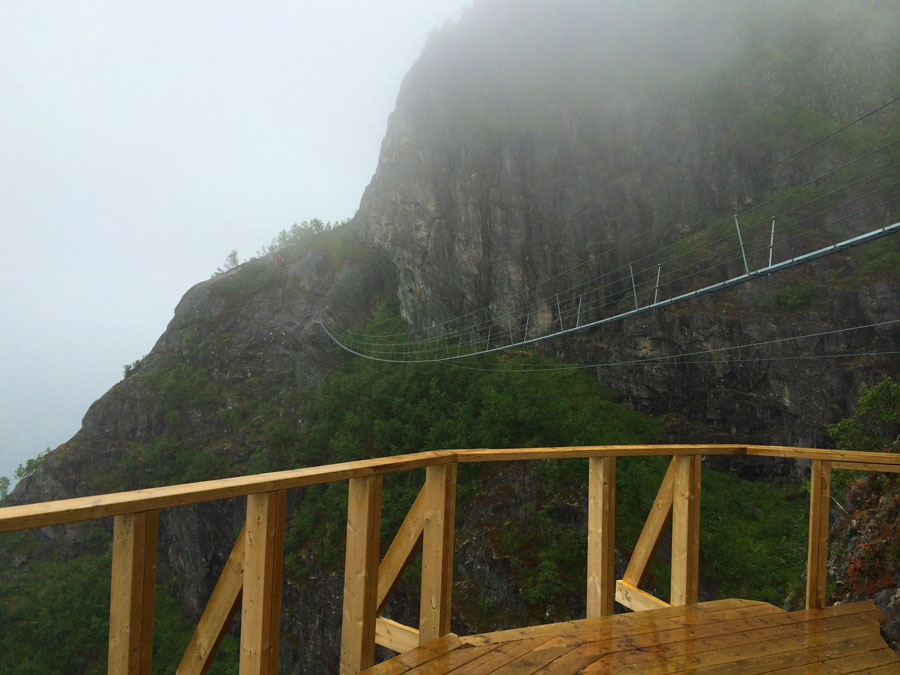
The last 100 m are similar to what we’ve been through already and take us to the end of the route, at an altitude of 950 m. There is still another 100 m of height difference to overcome before we reach the summit.
The views are spectacular at all times, even when the mist is thick and we can’t see the end of the bridge on our way back.
® Richie Riko
The way back
The way back is a path marked with red dots, not as visible as you’d like, since some of them are painted on smaller stones that can roll easily. There are two alternatives:
» One descends westwards and it looks like it’s the shortest one. It also takes us closer to Loen once back in the valley.
» The second one -which we chose- leads to Oppheim, a village with a yellow house where staff from Loen Active or from the hotel can pick you up (50 NOK per person). We sent a two-person advance party that picked our car up. A slightly slower option but great for saving a few euros in expensive Norway.
Bibliography
Loen Active (equipadores)Nearby routes
Last comment
Marcel Puig wrote 2 years ago
More equipped paths
Posts about via ferrata
Beginners Security Equipment Theory and technique Bolting a ferrataTop
Baumes Corcades 8.5Cascada del Sorrosal 8.8Cala del Molí 8.5Pasarela de Espeja 9.0Teresina 8.1Newest routes


Leave a comment / Status Alert
3 Comments
Repetimos la ferrata el 3 de Agosto del ´23
Coincido bastante con los dos comentarios anteriores.
Empezando por el principio, el párquing se comparte entre los turistas que quieren subir y bajar con el telesilla (Skylift le llaman aquí) y los ferrateros. Dividido en tres esplanadas a distinto nivel, actualmente es libre y absolutamente gratis. Se suele llenar hacia la tarde, pero a última hora se transforma en un lugar tranquilo y seguro donde pasar la noche si vas en furgoneta.
La aproximación se hace por una pista de fuerte pendiente que nace a la derecha del párquing superior. En principio prohibida a vehículos. Un par o tres de letreros, nos indican la dirección del inicio de la ferrata. De Hecho no tiene margen de error, es pista arriba hasta unas escaleras y letreros informativos. En ningún momento se menciona que para acceder haya que pagar.
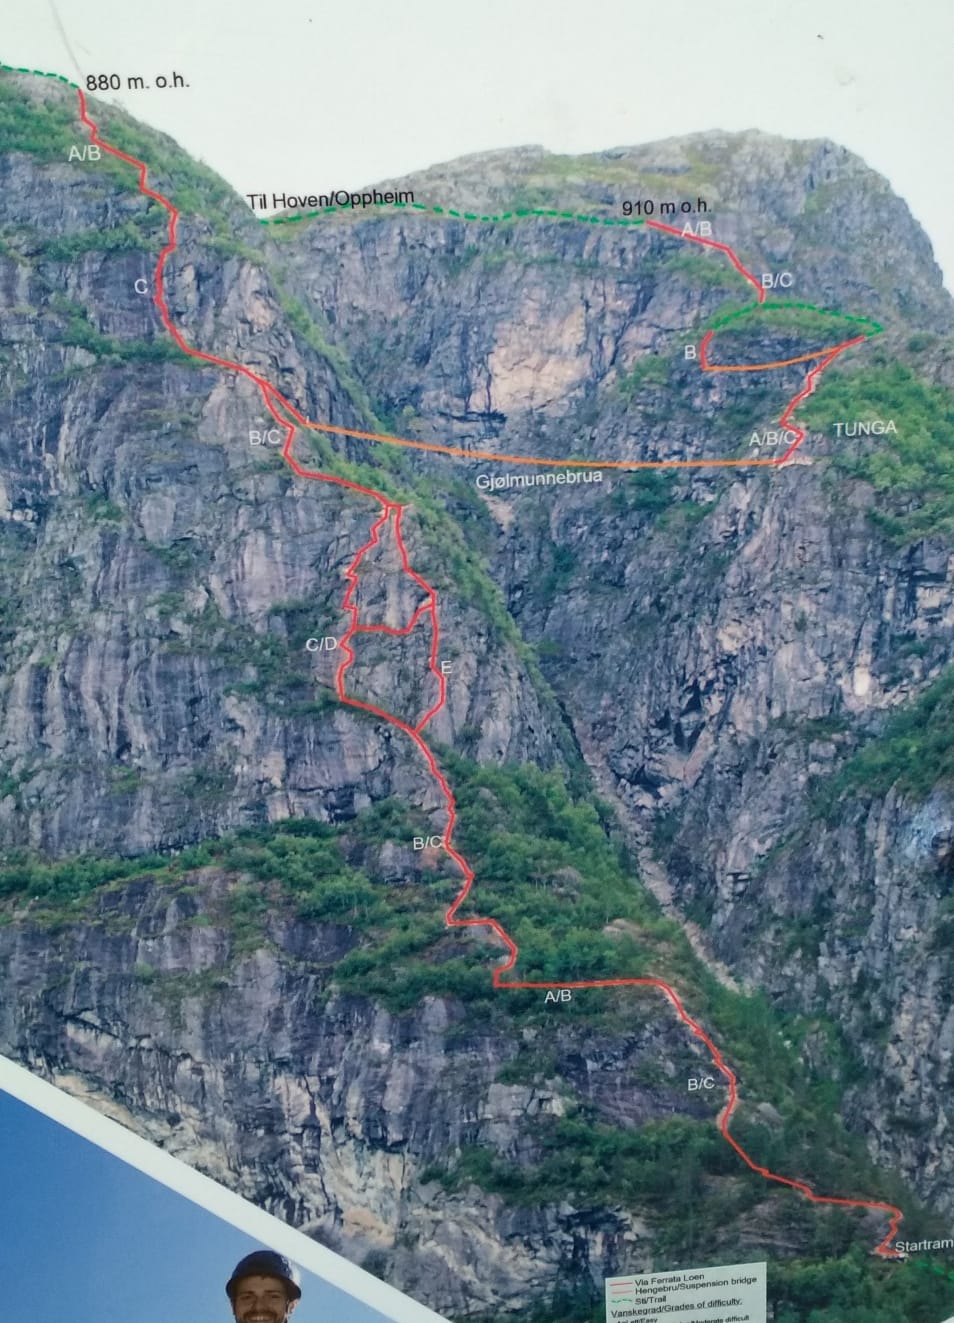
A la ferrata le van añadiendo variantes y empalmes, por lo que será interesante hacer una foto al letrero de los itinerarios.
Llama la atención que no mantienen la misma nomenclatura que nosotros sobre la dificultad. Utilizan las letras desde la A a la F. De hecho, la A es nuestro K1, mientras que por ejemplo la D es K4 y la F es K6.
A nada que se empieza, una cosa queda clara. Cosas de Noruega, la ruta va a estar mojada llueva en ese momento o no. Al ser un recorrido sin grapas metálicas sino que hay que agarrarse a la roca, se asemeja más a un camino equipado que no a lo que entendemos aquí por ferrata deportiva, por una sencilla razón. O te coges al cable o no subes. Esta situación se me hizo muy incómoda, pero no había otra manera y a mi modo de ver, le quitó casi toda la gracia.
Ya desde el párquing, se puede observar lo que hace famosa a ésta ruta. El puente de 120mts y que desde lejos, parece que vaya a ser psicológicamente duro. Pero, lo que son las cosas, en cuanto llegas ahí, te das cuenta que nada más lejos de la realidad. Han hecho el paso de pie ancho y con plataforma metálica, con lo que practicamente se puede pasar a la carrera. Aviso: Si los cabos de vuestro disipador son más bien cortos, necesitareis una prolongación para llegar al cable de vida que en este tramo está instalado sobre la cabeza y hacia el final, queda alto.
El cencerro que encontraremos al final, tiene doble utilidad. La primera quitar el stress del cruce y la segunda, avisar a los que vengan detrás de que el puente ha quedado libre. Viene de perlas en el caso de niebla cerrada. Situación habitual por cierto. Un cartel al principio dice que máximo 4 personas a la vez.
Más arriba lidiamos con un barranco a nuestra izquierda en el que se agradece que siga habiendo cable de vida y al poco, empezamos a encontrar tramos de camino con escaleras o sendero.
Pasamos por debajo de dos lineas de tirolina (de pago) y seguimos subiendo por el sendero hasta un cruce. En caso de niebla, conviene saber que el edificio del telesilla, está hacia nuestra izquierda. Puede que entre los jirones de niebla veamos lo que resulta ser una enorme herradura. Pues bien, la entrada al telesilla se encuentra justo enfrente, a unos 70mts. El primer piso es un restaurante, sin entrar a él, bajamos un nivel y nos encontramos en la recepción del telesilla. A la derecha máquinas expendedoras de ticket. Cruzamos el torno y en 4 minutos volvemos a estar en el coche. Eso si, previo pago de casi 50€. Noruega es cara.
El horario del telesilla (Skylift) es muy amplio, desde las 8.30 de la mañana hasta las 11 de la noche. La cadencia parece que depende de haber llenado la cabina.
En conclusión, no estoy seguro de qué dificultad darle a la via. No veo la manera de graduar un recorrido cogido a un cable, por lo que deportivamente se puede decir que al menos el tramo sencillo que es K4 o letra D, no tiene un gran interés. Mención aparte se la lleva el paisaje de los fiordos. Ése si que es sensacional.
Salud y buenas ferratas
Hemos estado en Loen, Septiembre de 2022, te cobran 200 Nok si quieres hacer la ferrata, aunque lleves tu propio equipo.
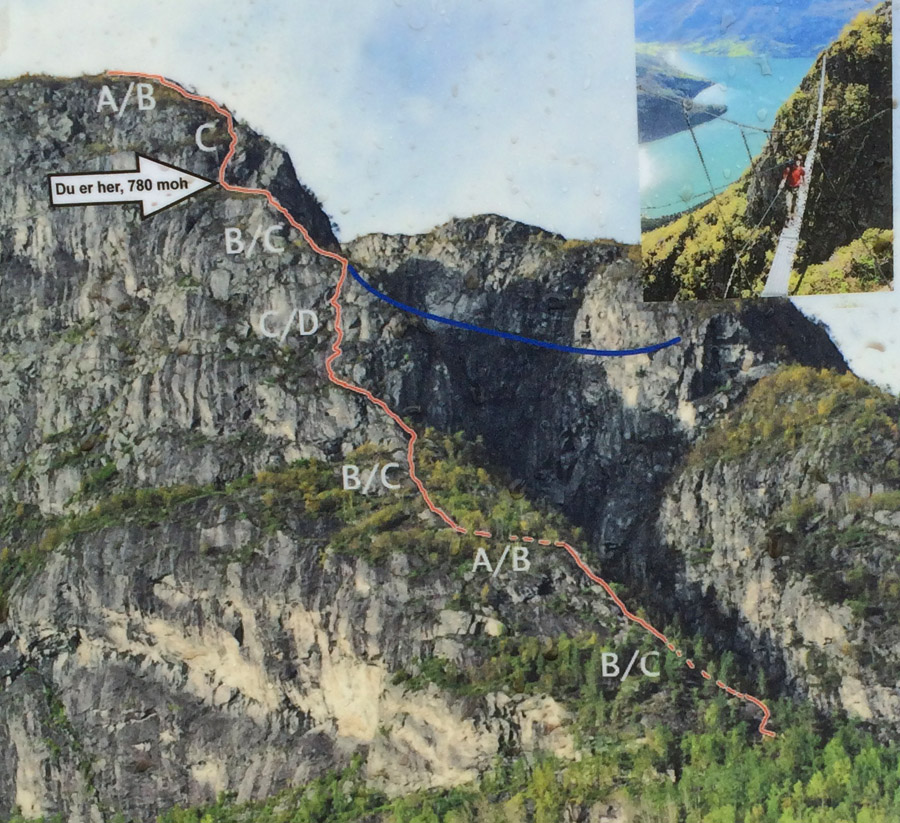
La hicimos el 21 de Agosto y han ampliado la Ferrata pudiendo elegir a mitad de Ferrata entre un recorrido de dificultad C/D que a mi pareja le pareció un K4 fuerte sobre todo la primera parte de este tramo y yo me fui por el nuevo de dificultad E que a mí me pareció un K5 ya que desploma un poco y es muy vertical, y no hay ni un escalón por lo que es bastante físico. Después al pasar el puente, también se puede seguir hasta arriba pasando un puente tibetano, pero nosotros hicimos el recorrido de ida y vuelta por el puente colgante para hacer el tramo que según el croquis es más complicado. Ferrata sin apenas escalones con un cable de vida del tamaño de una cuerda de CrossFit para usar a modo de cadena para subir, yo hice alguna parte sin usar el mega cable pero hay pasos que sin pies de gato yo por lo menos no me atreví.
En mi opinión la vía Ferrata está graduada para usar el cable a modo de cuerda convirtiéndose este en tu mejor amigo en los tramos difíciles.
Por otro lado han construido un telecabina que sube y baja hasta donde finaliza la Ferrata por lo que ya no está la opción de que te recojan en el pueblo, así que pagas unos 40€ por cabeza para que te baje el telecabina o haces como nosotros y bajamos hasta el coche andando que fueron unas 3 horas y media pero viene señalado, lo malo que el último tramo hasta el coche es por la carretera teniendo que ir por el arcén y con cuidado de salirnos cuando pasaban coches. Por otro lado para iniciar la Ferrata hay un gran aparcamiento pero pone que solo es para los usuarios del telecabina por lo que opte por dejarlo en el arcén de la carretera un poco más adelante por donde sabía que teníamos que regresar.
En definitiva Ferrata expectacular con vistas inmejorables pero como siempre en Noruega si quieres las cosas fáciles te toca soltar pasta.