 Full list of equipped paths
  Via ferrata
 Equipped path
 Equipped section
 Equipped canyon
 Via cordata
 Via cable
 Trails
 Bike routes
 Blog
Blog All photos
 Mountain guides
Ok
13-12-2013 outdooridee.com
No status information for the last 9 months. Add status alert
Via ferrata Zugspitze Klettersteig
The Zugspitze is at 2962 meters the highest peak in Germany. We can ascend it in one day combining a long approach with via ferrata steps and the passage through a glacier.
K5GermanyVia ferrata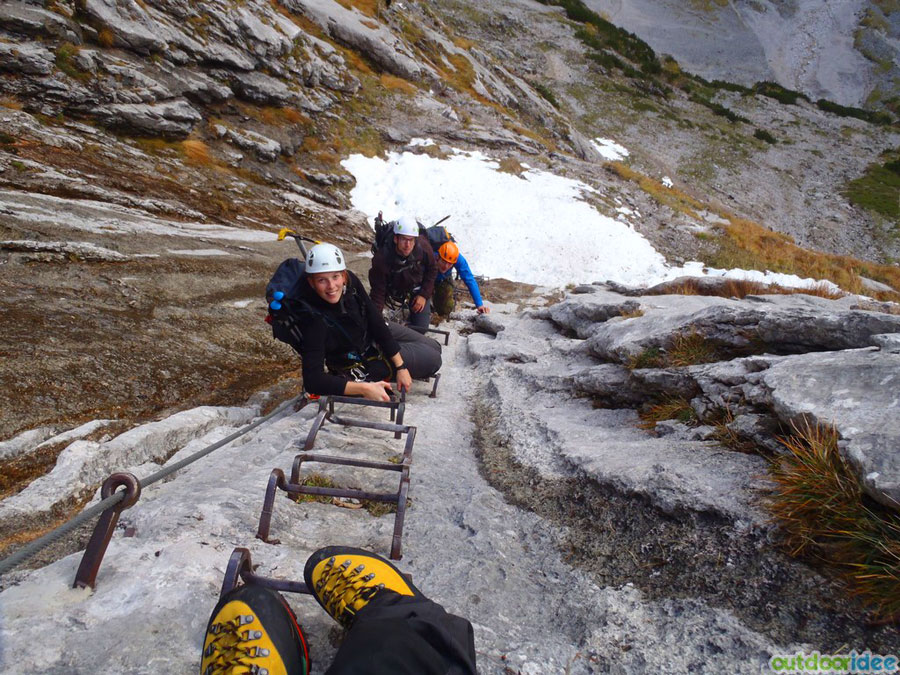
Start of the first section of via ferrata

Location
HammersbachGrainauBavieraGermany Technical description Route status
  Type
Type  Access Time
 5'
 Route duration
 10 h.
 Return duration
 1 h.
 Length of Equipped Section
  Total Distance
 13 km
 Equipped Ascent
  Total Level Difference
 2200 m.
 Desplomes
 0
 Bridges
 0
 Zip line
 0
 Rope
Rope Yes
 Beginners
 No
 Child Friendly
  Private
 No
 Orientation
 East
 Season
How to get there
Best to park in Hammersbach, the train stops in this place on the way back.
Getting closer
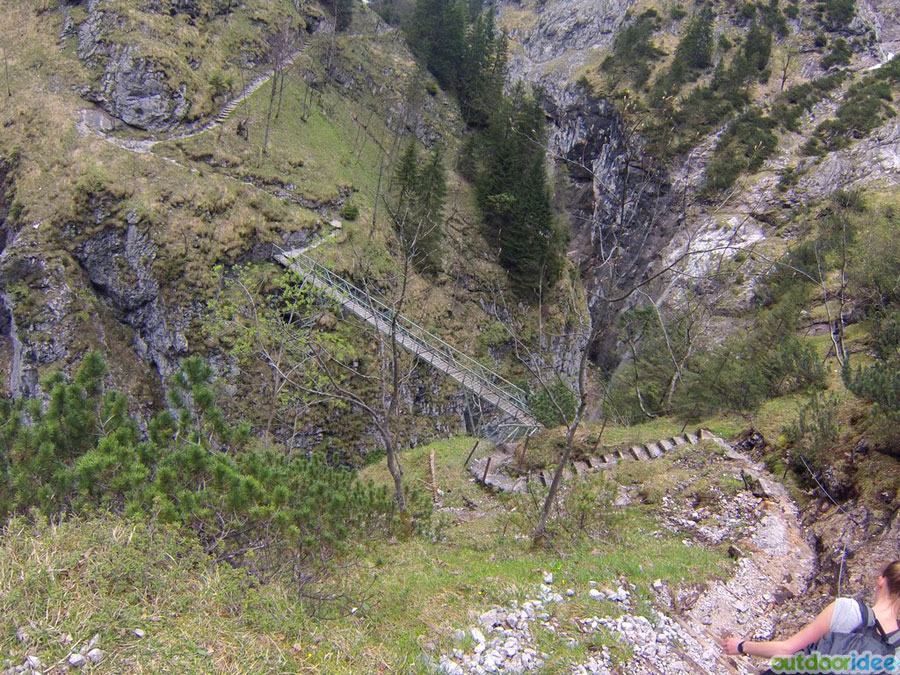
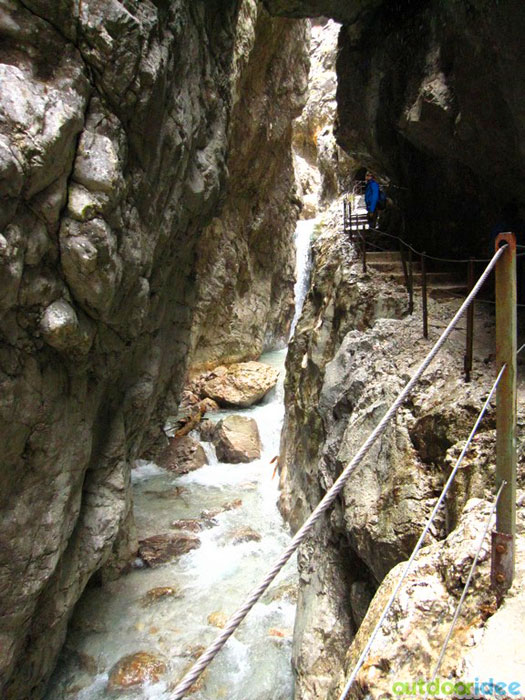
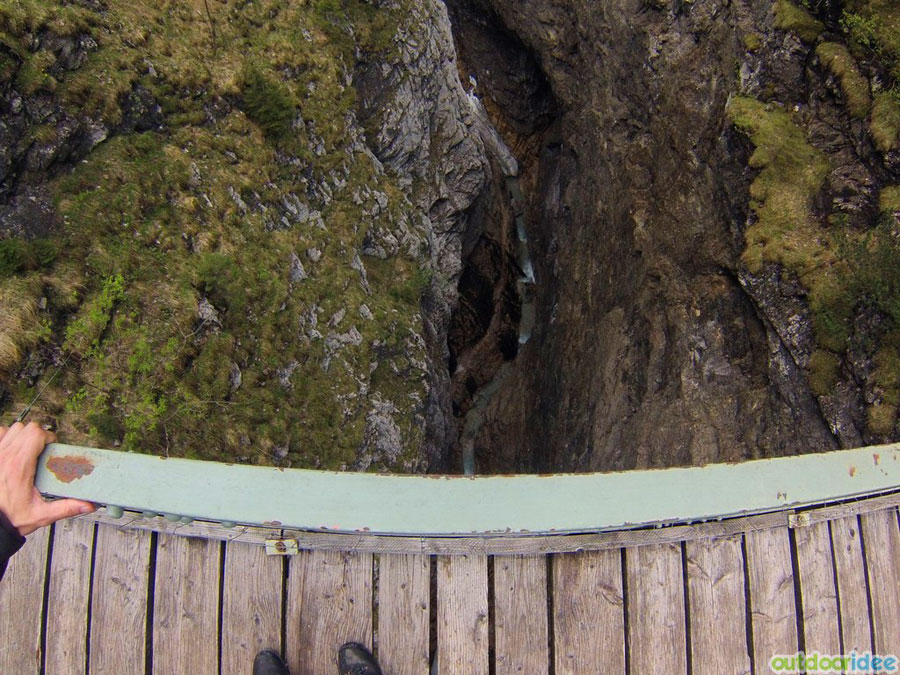
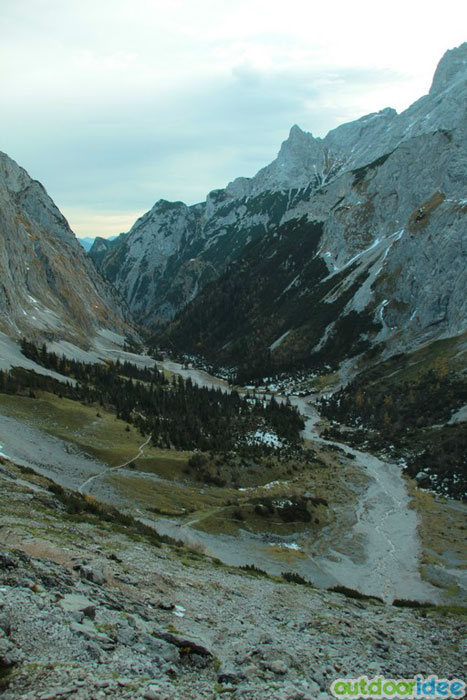
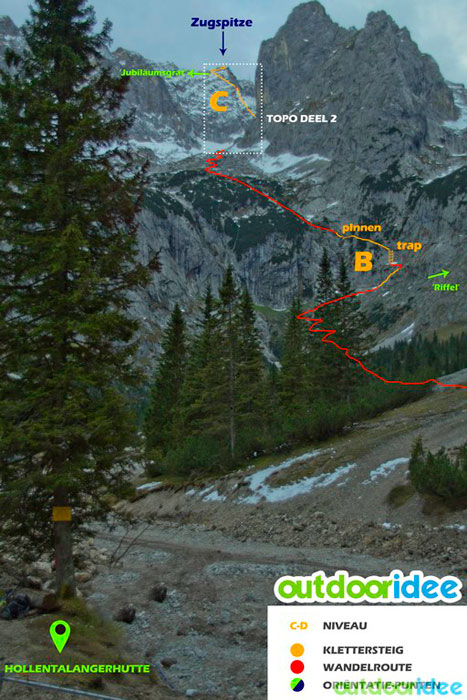
If you leave early (before 08.00) you have to take the route Stangensteig, because the gorge is not yet open by then. De Stangensteig is a beautiful route as well! Small paths and a high bridge (70 m) over the gorge. De Stangensteig brings you to the same point as the ‘gorge’-route (see map). After the intersection you follow the route to the Höllentalangerhütte. From here it’s difficult to see the first klettersteig, but the path towards it, you can’t miss.
The route
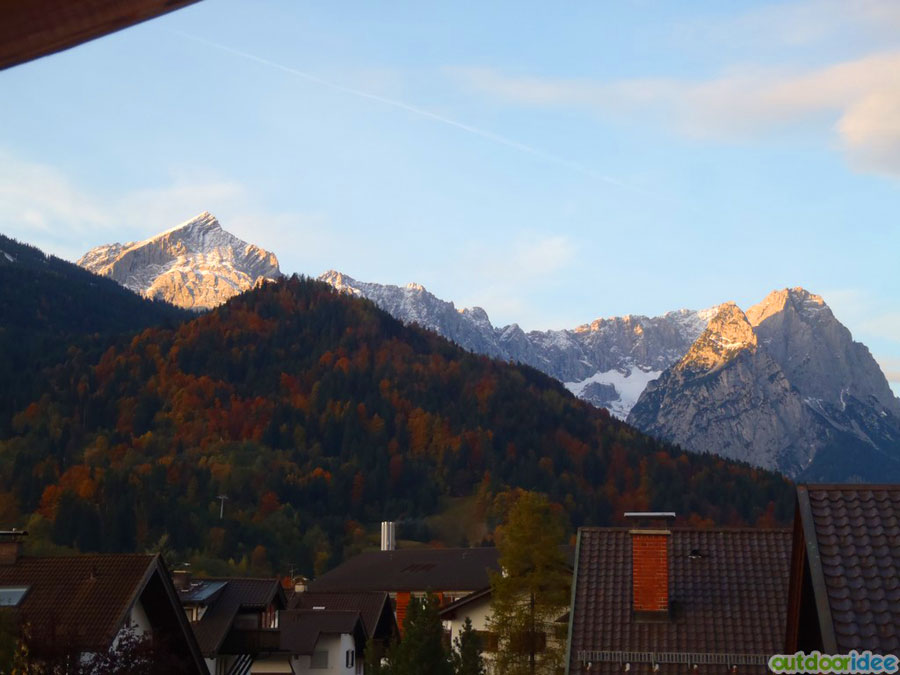
Views from the village
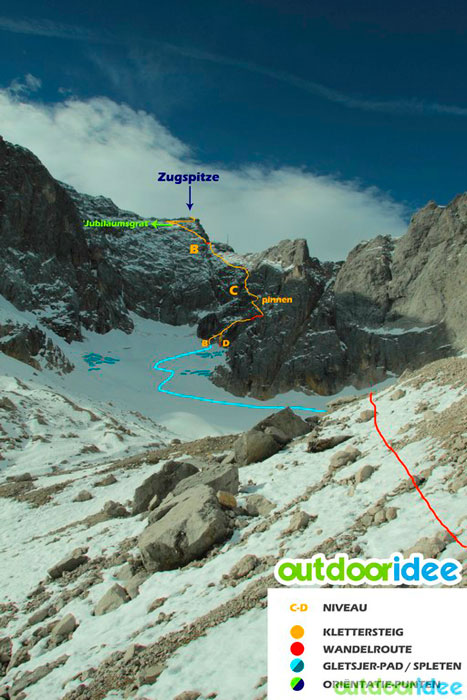
Via ferrata | First Section
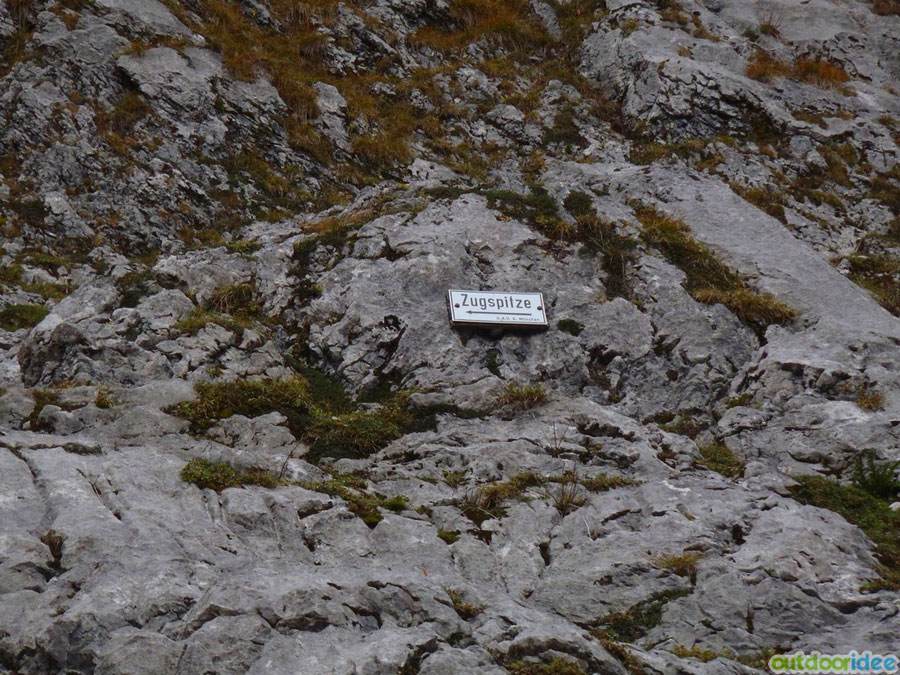
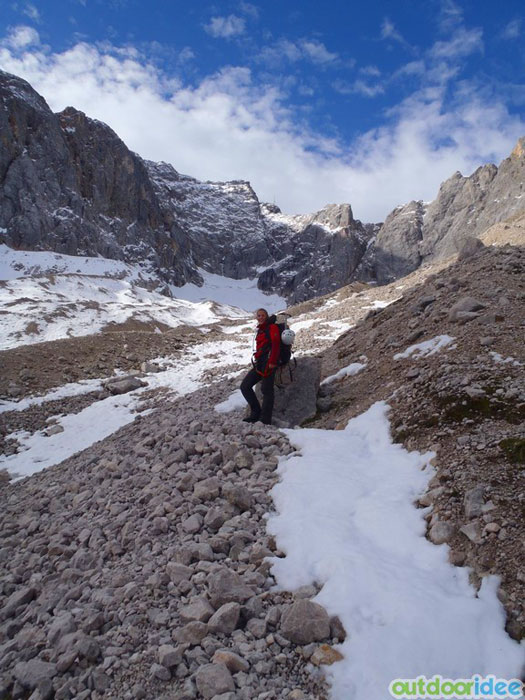
The start of the klettersteig is very difficult to see from a distance, but no panic! After a while you notice a white sign which points to the left ‘Zugspitze’. The start of this klettersteig is fairly simple. After that comes a ladder, a small path and a traverse with pins and that’s it. After this first klettersteig you have to climb a little bit (level 2, French grading) until you reach the ‘normal path’ again. You follow this path until you reach the glacier.
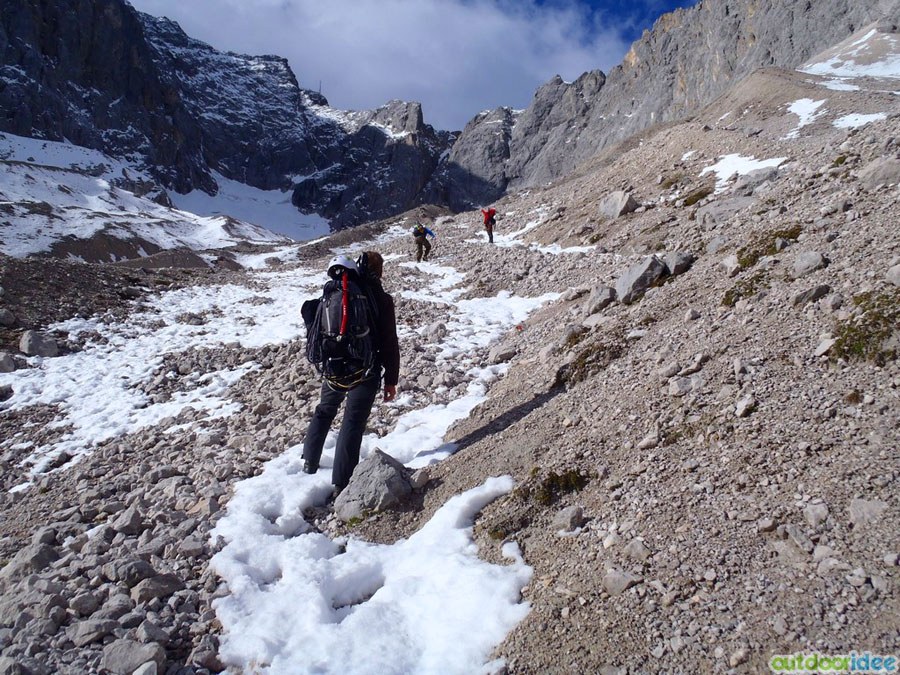
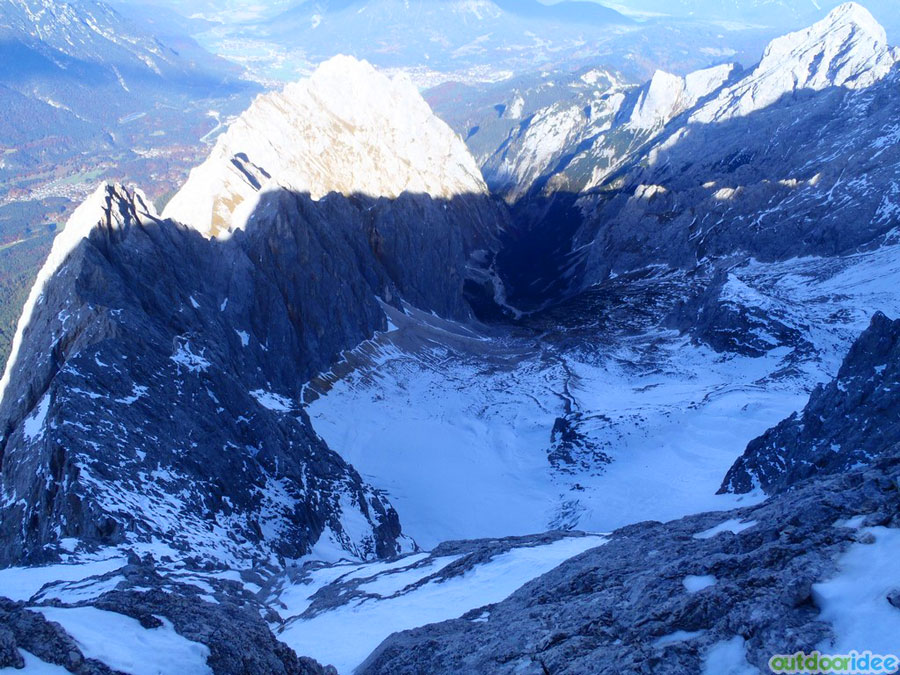
Höllentalferner | Glacier
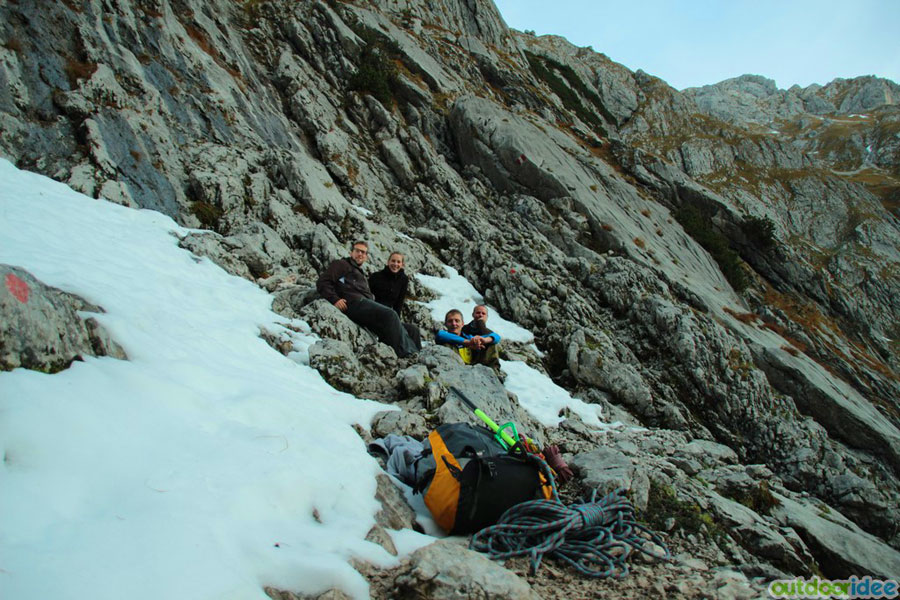
The glacier is ‘quite simply’ but do not make mistakes about it! It’s still a glacier. You will probably see a lot of (German) people crossing this glacier without a rope. It’s up to you if you decide to go with / without a rope (depending on your own skills). The glacier does not have a lot of giant crevasses or steep slopes. The second klettersteig is on your right (look for red markings) on approximately 2/3 of the glacier.
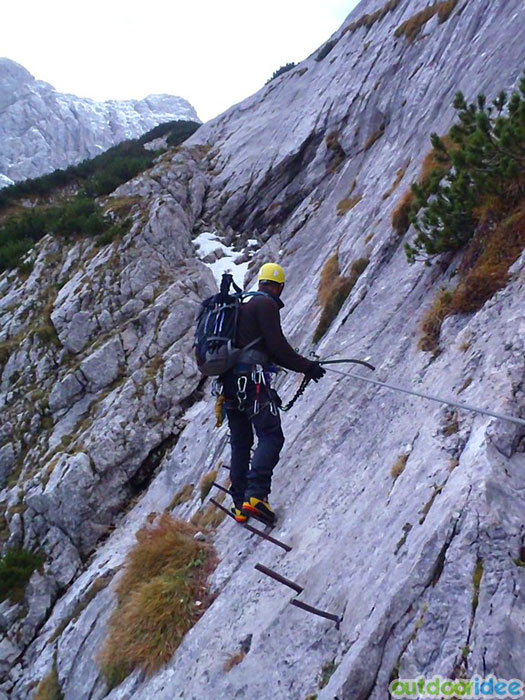
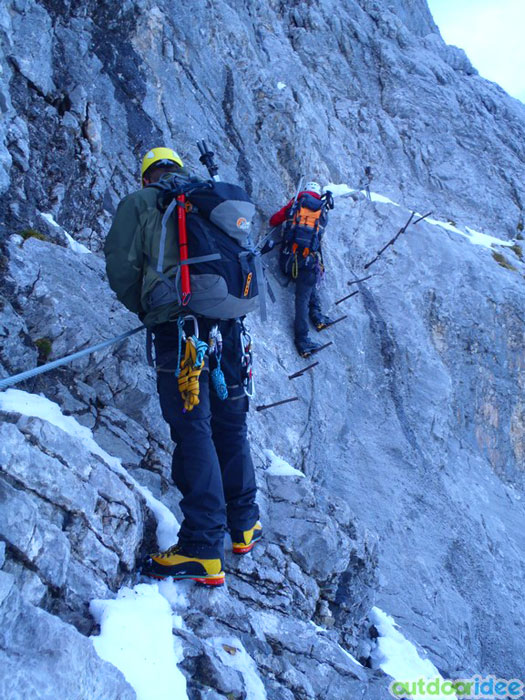
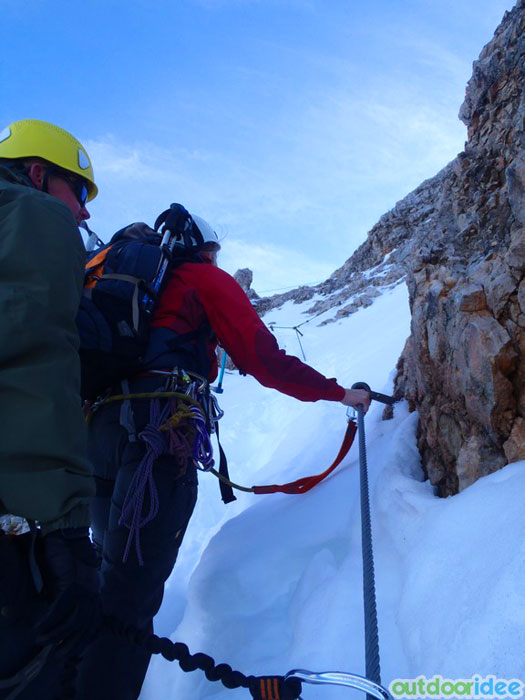
Vía ferrata | Second Section
It can be quite difficult to get ‘into’ the second klettersteig. This depends on the amount of snow. The glacier is melting away from the rock, so there’s a gap (especially in the summer) between the glacier and the rock. On the left is a (newer) section of klettersteig which in easier to take that the one on the right.
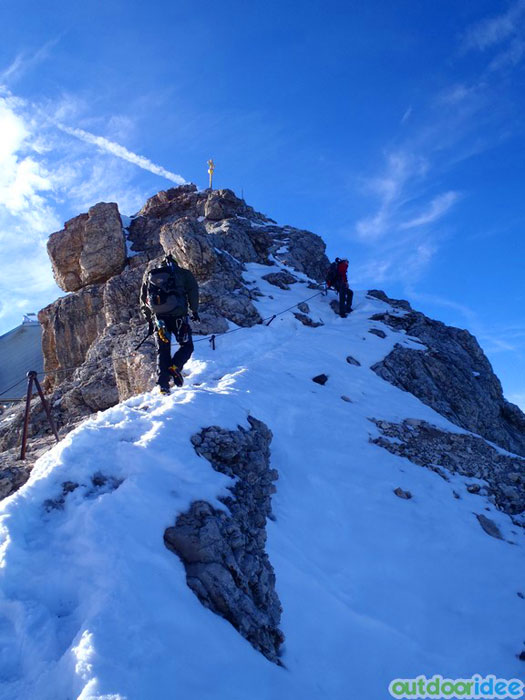
After about 50 meters the klettersteig stops for 50 meter and then starts again. From here it goes all the way to the top. Try to enjoy this second klettersteig as much as you can, because it’s beautiful! Just before you reach the top, on your left, you have the ‘Jubiläumsgrat’. Germany’s longest route over a ‘grat’(ridge).
Back views
Important tips
Long trip, a good condition is critical!. The best period is the Summer, it’s very crowded than, but the weather is the most stabile (no snow on klettersteigs). It’s a level D because the trip is so versatile (long hike, klettersteigs, glacier crossing and then another klettersteig).
The way back
From the top you can take a cable car to the lower station (trainstation). From here you can take the train all the way to Hammersbach. Ask the personal if you have the take a ‘tranfer’ train, this depends on the season.
The costs for this trip back or ±€30,- (2013).
From the station in Hammersbach it’s easy to walk balk to the car (5 minutes). Nearby the trainstation is a restaurant. Take a beer, you deserved it!
Bibliography
OutdoorideNearby routes
Last comment
Roberto Oliveras wrote 7 years ago
More equipped paths
Posts about via ferrata
Beginners Security Equipment Theory and technique Bolting a ferrataTop
Baumes Corcades 8.5Cascada del Sorrosal 8.8Cala del Molí 8.5Pasarela de Espeja 9.0Teresina 8.1Newest routes


Leave a comment / Status Alert
4 Comments
En primer lugar gracias por la info, todo correcto. La he realizado esta semana (agosto 2018) Respecto a la dificultad, me ha parecido menos difícil de lo esperado, eso si, no hay que perder de vista que se remonta un desnivel considerable y el factor físico es importante. Lo mas complejo a mi parecer es el glaciar (no descuidarse los crampones) y el paso del mismo a la pared, yo he encontré poca nieve y hay unos quince metros sin presas a remontar por el cable con una cuerda paralela con algún lazo a modo de protección puntual, se lía algo de pitote en este punto. (paciencia) Con calma se remonta bien, otra opción es entrar por la linea original, hay unas chapas para progresar en artificial hasta las grapas, ninguno subimos esto en cuenta y si llevas unos pedales entras por el teletak. Yo no tuve la suerte de ver el paisaje desde la cima, mucha niebla..
Hola Javi,
Yo la hice con material básico de ferrata, lo único extra fueron los crampones para pasar el glaciar (No es estrictamente necesario, pero hay bastante hielo, al menos en Septiembre cuando yo fui). Por lo demás todo el material básico que llevas para hacer una via ferrata. Intentar salir lo antes posible,tenéis que tener muy en cuenta la bajada del último telecabina sino queréis quedaros a dormir en lo alto. Y si disponéis de un gps no os ira mal aunque esta todo bastante bien señalizado. Y sobre todo y lo más importante, DISFRUTAR de cada segundo en esa montaña, es mágica, desde el paso de la ferratas hasta el paso por las diferentes grutas que hay por el camino.
Hola David,
Es probable que este verano vayamos a hacerla, ¿es necesario llevar cuerda para asegurar o hay cable de vida en todo el recorrido? (quitando el glaciar y demás...)
¿Alguna recomendación más a parte de las aquí descritas?
Gracias!
Bueno para mi, la mejor via ferrata que he echo, tanto por los tramos de via ferrata como la ascensión larga y a tramos muy duros, pero recompensa totalmente llegar a la cima y disfrutar de las vistas tan espectaculares.
Yo la hice a mediados de Septiembre y hubo alguna zona muy nevada hasta incluso zonas que por la niebla no se veía nada.
Quería escribir para avisar solo de una cosa, yo cuando la hice mire esta pagina y alguna otra para recoger 9infomación, pero creo que algo que no se comenta en exceso y es muy importante, es el regreso, hay que calcular muy bien la hora de llegada a la cima y la hora de cierre de la estación.
Si alguien se dispone hacerla y quiere algo de información que pueda darle.
Un saludo